These days each application allows you to change its appearance to the dark mode. For example, in the same way, Excel (Office) allows you to switch to dark mode. In this tutorial, we will learn to activate it and understand why this feature has room for improvement.
Steps to Activate the Dark Mode
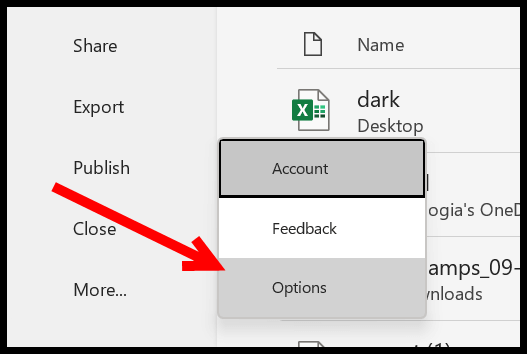
- First, click on the File Tab.

- And open the Excel options.
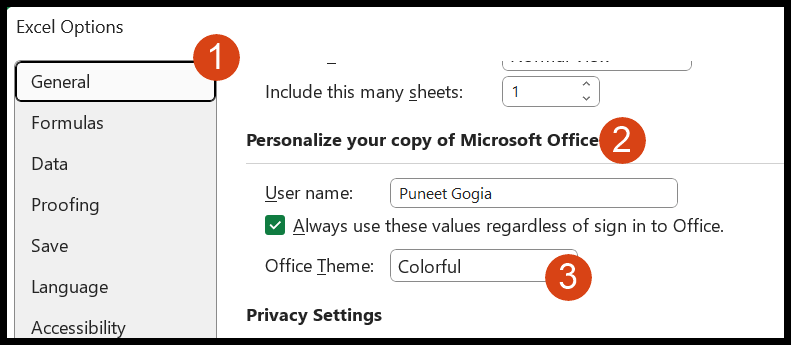
- Now in the “General” tab, go to the “Personalize your copy of Microsoft Office”.
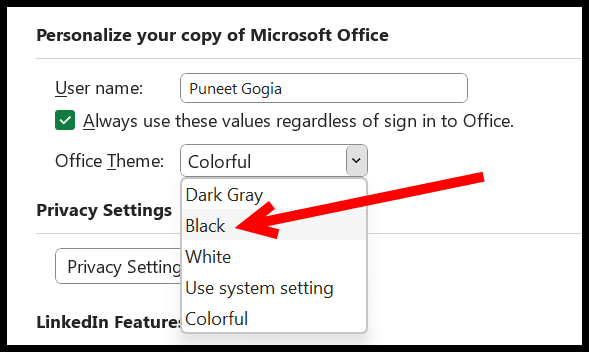
- From the “Office Theme” drop down, select “Blank”.
- In the end, click “OK”.
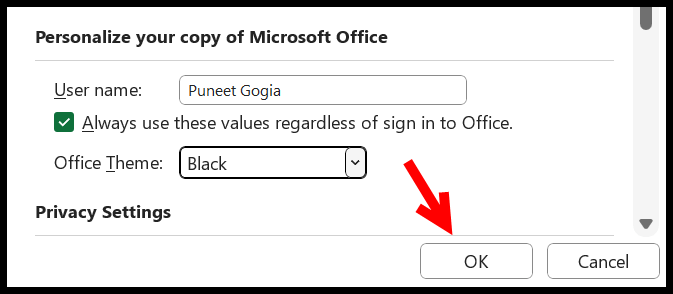
When you click OK, it applies dark mode to Excel, leaving the spreadsheet part as it is. But the rest of the windows will be blank entirely.
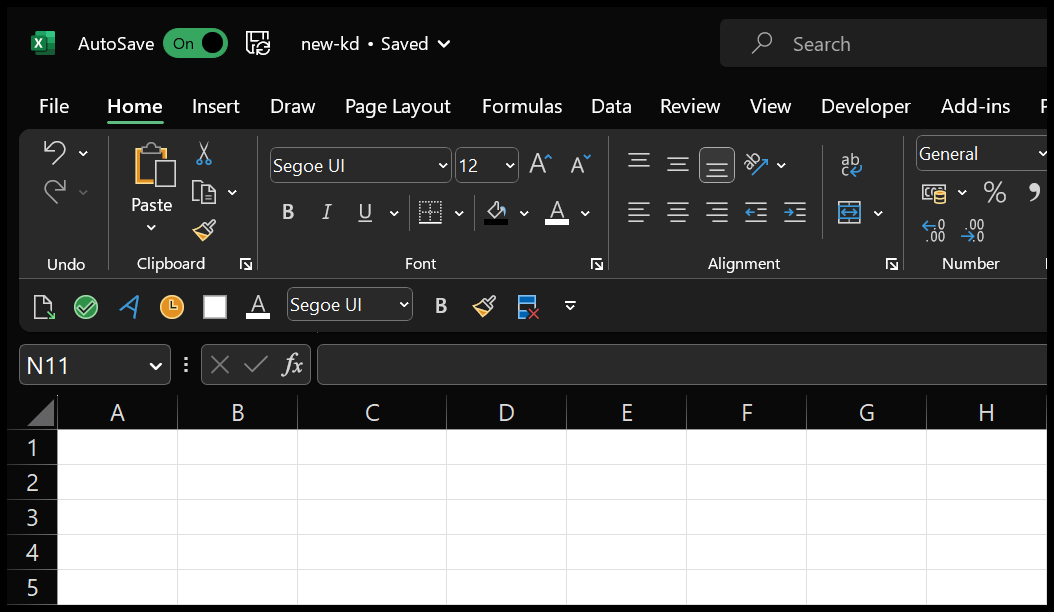
There’s one thing you need to know: when you change Excel’s appearance, it also makes changes to other Office applications, like Word and PowerPoint.
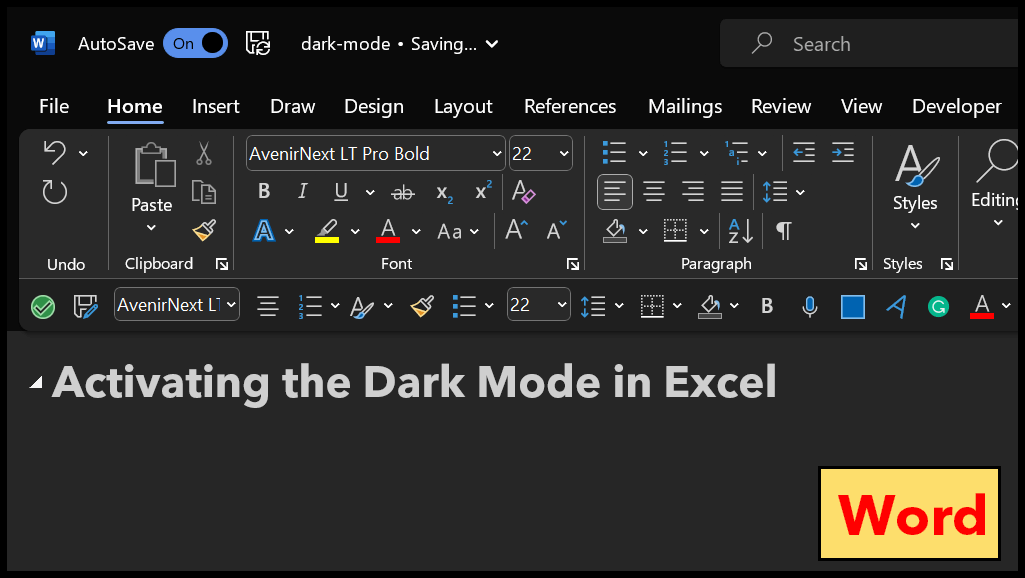
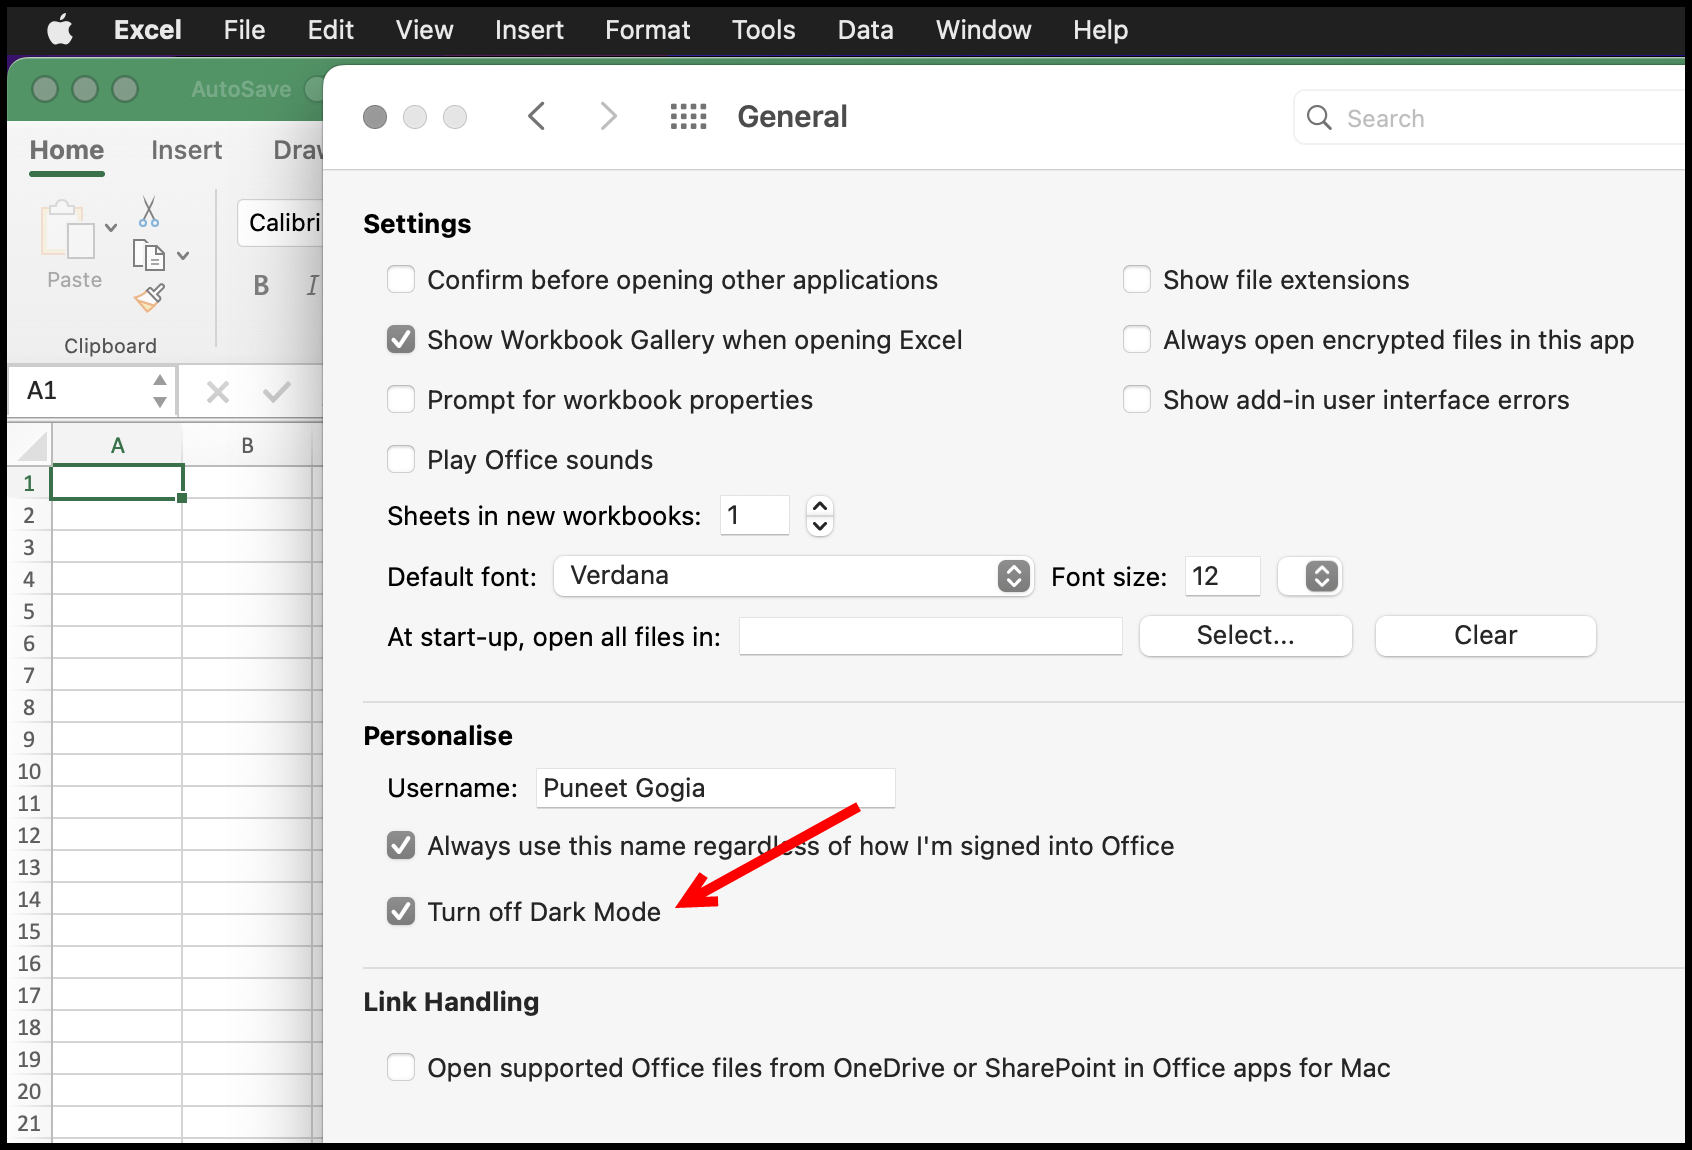
But as you can see in Word, it changes the entire Windows into dark mode, but in Excel, you still have cells white and the text blank. And if you are using Excel on Mac, you need to go to the Excel ⇢ Preferences… ⇢ General, and un-tick “Turn off Dark Mode”.
Turning Cells into Dark Mode and Font as White
There’s a simple hack that you can also turn your cells into dark mode.
- Add a Black Background with an image.
- Change the Font Color to White in the theme.
Use these steps:
- First, open the PowerPoint in your system and add a single slide.

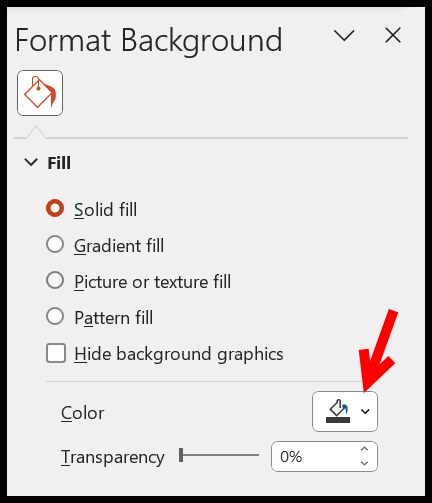
- After that, click on the Design Tab and go to the “Format background”.
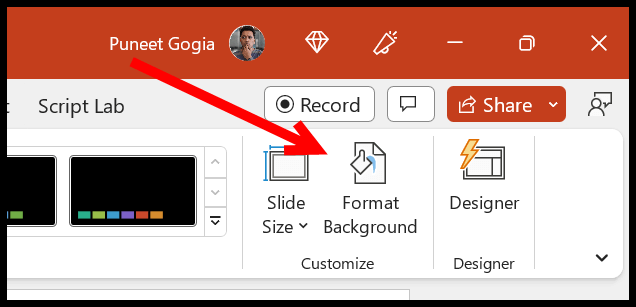
- Now, change the color to Black or any other dark color you want. I have used the (HEX: #3a3a3a) color code to get a custom dark color.
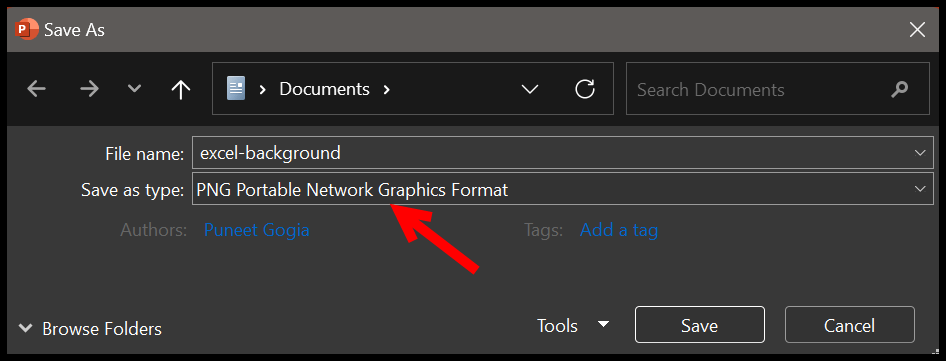
- Then go to the File Tab, click “Save As”, and save the presentation as a PNG file format (Image). Or you can download it from here.
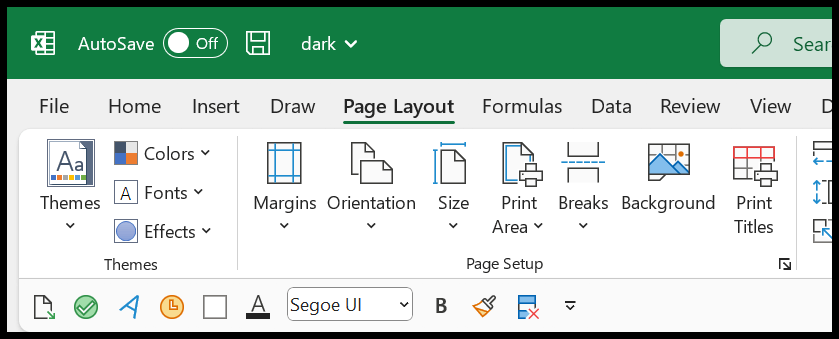
- Now return to Excel and go to the “Page Layout” tab. From there, click on the “Background” button.
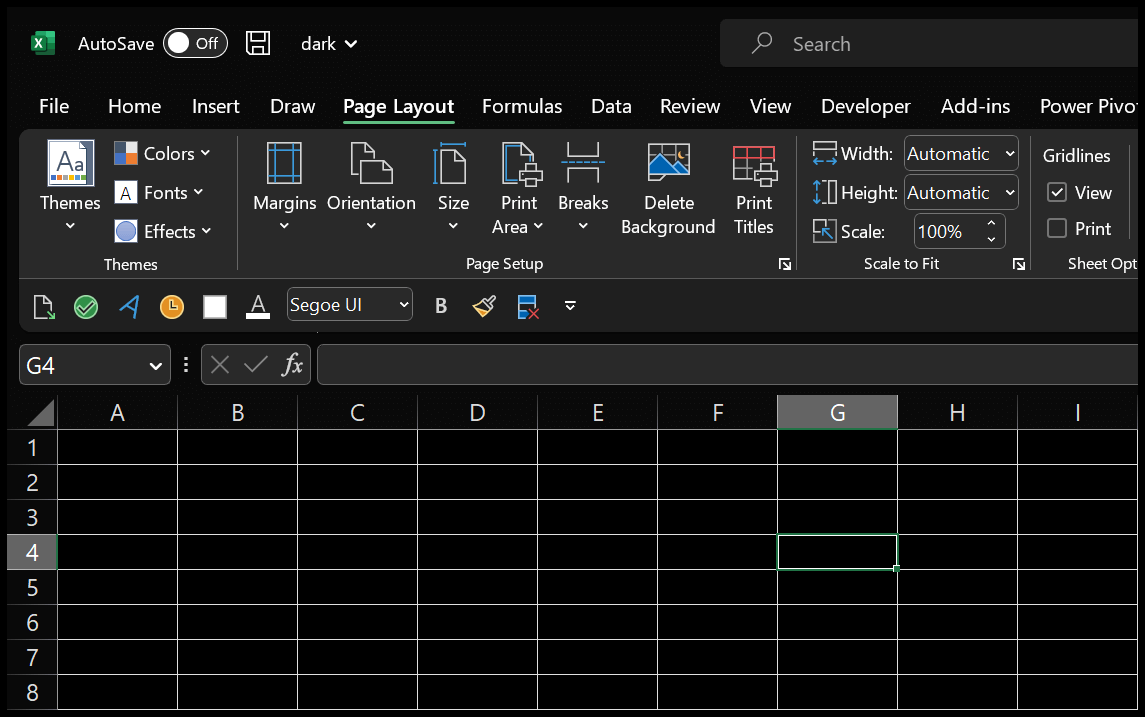
- Next, locate the background image we have just saved and apply it.

It will convert Excel into complete dark mode.
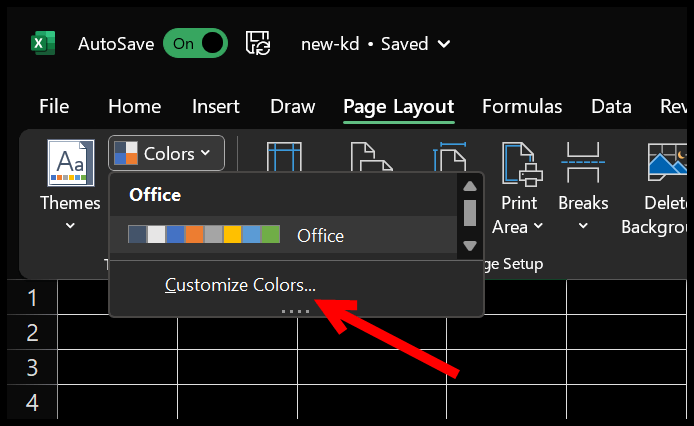
But there’s one thing you still need to change: the font color. So, go to the Page Layout ⇢ Themes ⇢ Colors ⇢ Customize Colors.
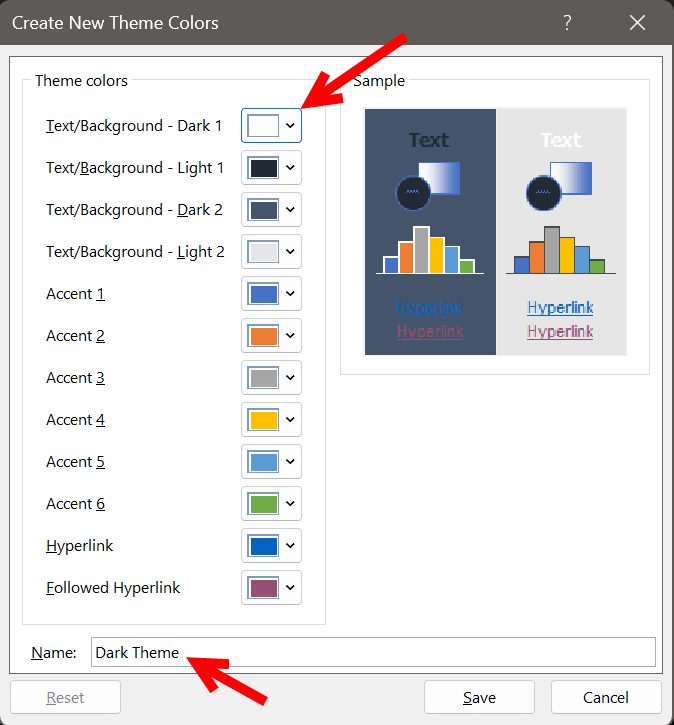
In the customized color, change the font color to white or any light color you want. And name it “Dark Theme”.
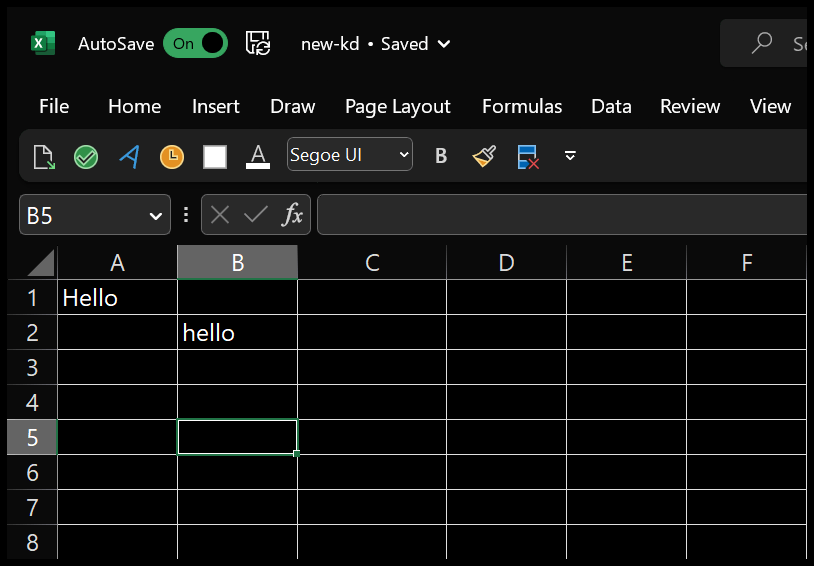
Now you have a completely dark theme with blank cells and white font.
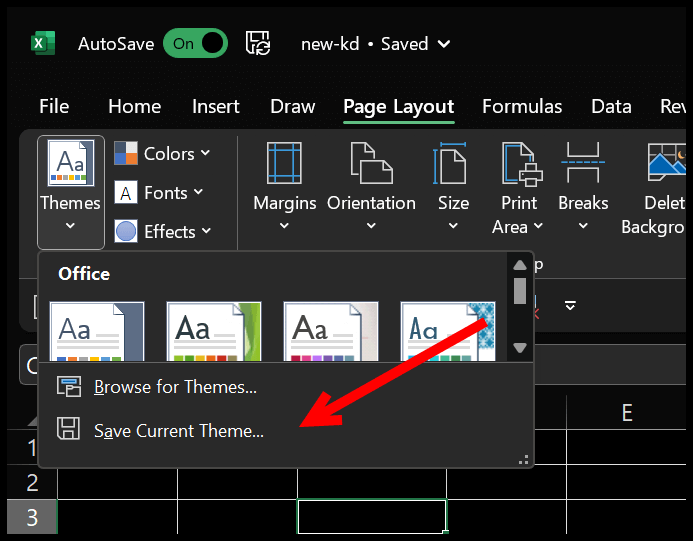
You can also save the entire current theme. Page Layout ⇢ Themes ⇢ Themes ⇢ Save Current Theme.. and name it the dark theme.
Important Points
- Adding a blank background with an image only works in the current worksheet.
- Changing the font color with the theme only works for the active workbook.
Even though these steps are not hard to follow, I am still looking for an option from Microsoft to create a toggle button to switch to the Dark and Lite modes with a single click.
You can go to this link and submit feedback to let Microsoft know this feature is required. And I’m opening a comment for this post so that you can ask your question if you are facing a problem.