In Excel, the alignment helps you to align the text and values in the worksheet cells. By default, the number aligns to the bottom right and the text aligns to the bottom left of the cell. In this tutorial, we will learn to adjust the text alignment in two ways- Horizontally and Vertically.
Change Alignment using the Ribbon
To change the alignment of the text in Excel from the ribbon.
- First, select the range of cells that you want to realign.
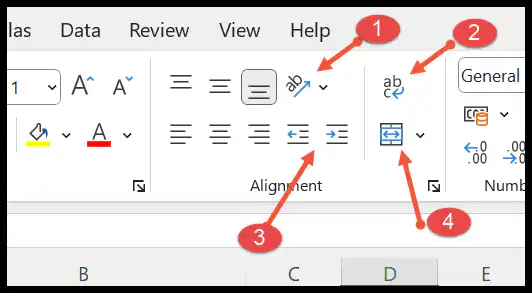
- Next, go to the Home tab and select the Alignment group.

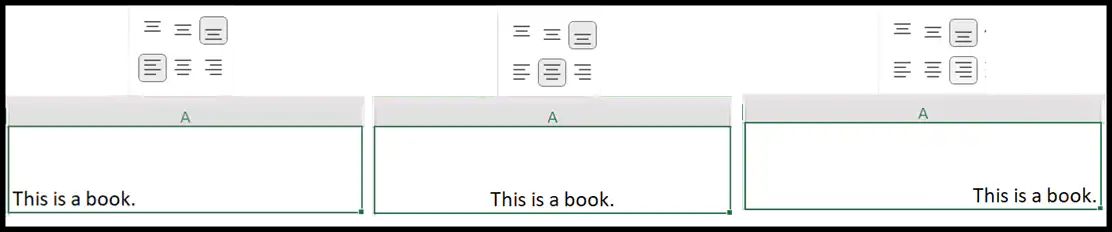
Vertical Alignment
You can use the following options to align the data vertically.
- Top Align- It allows you to align the text as well as the number to the top of the cell.
- Middle- Aligns the data to the center of the cell.
- Bottom- This is the default option, and it puts contents to the bottom of the cell.
Horizontal Alignment
To align the data horizontally, then use the below options:
- Left Alignment- Aligns the text to the left edge of the cell.
- Center- It puts the text and number in the middle.
- Right- Aligns the contents to the right side of the cell.
Other Options
- Text Orientation (Rotate Text): It allows you to change the Orientation of the text vertically or diagonally.
- Wrap Text: This option helps you to wrap the lengthy text into multiple lines in a cell.
- Indent: There are two indents in the alignment group. When you click on the Increase Indent icon, it moves your text further to the right. However, to get the text back to the left, click on the Decrease Indent icon.
- Merge: It is used to combine the selected cells into a single cell.
Change Text Alignment from Format Cells Options
Another way to change the text alignment is through the format cell dialog box. Here, below are the steps for this.
- Again, you need to select the cell that you want to re-align.
- Next, open the Format cells dialog box from the bottom right corner arrow in the alignment group.
- Next, select the alignment tab from the format cells dialog box. In this, choose the desired option from the horizontal and vertical drop-down for aligning the text.
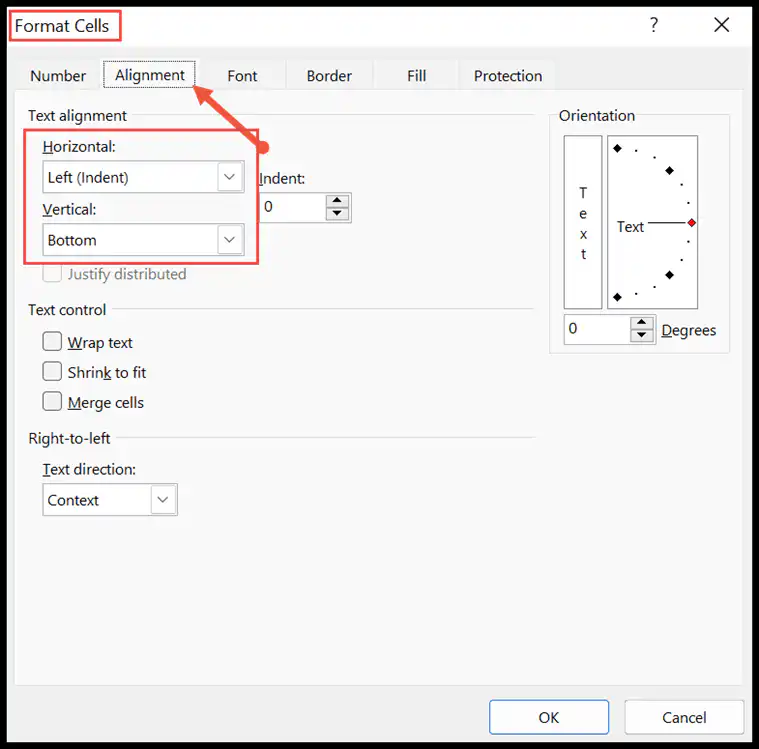
- Now, select the horizontal and vertical text alignment from the drop-down options and click the Ok button to apply it to the selected cells.
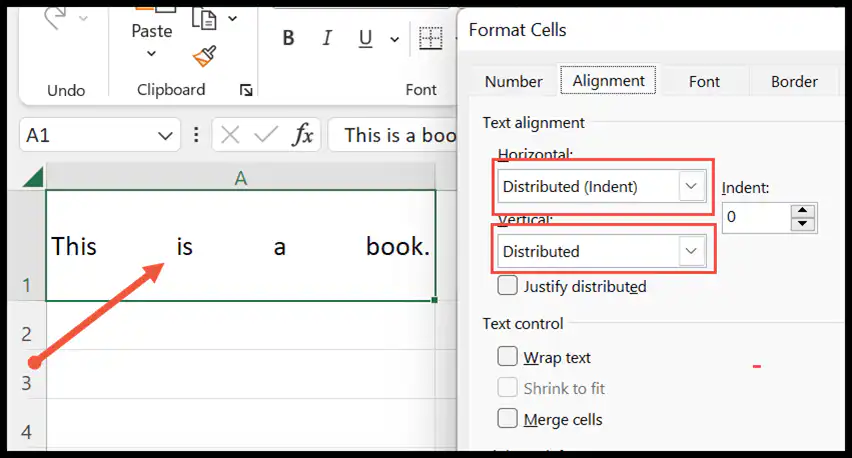
For example, we select the “Distributed” in both horizontal and vertical text alignment. The below snapshot shows the text distributes equally across the height and width by increasing the space in between the words to fill the cell.
Changing Text Direction
At the bottom of the format cells box, there is an option to change the direction of the text. The default setting is Context, but you can change it to left-to-right or right-to-left.
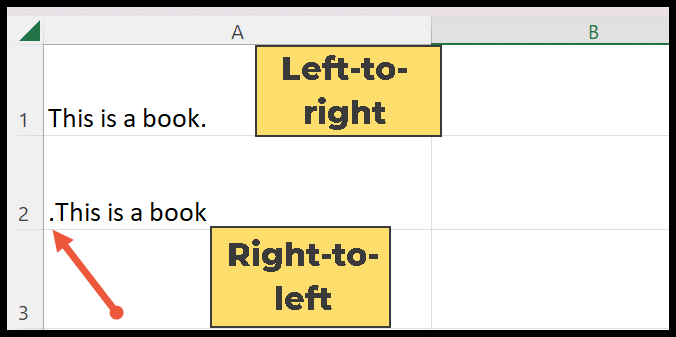
- The default direction of the text is from left to right.
- And the right-to-left option is used in the case of some specific languages like Arabic.
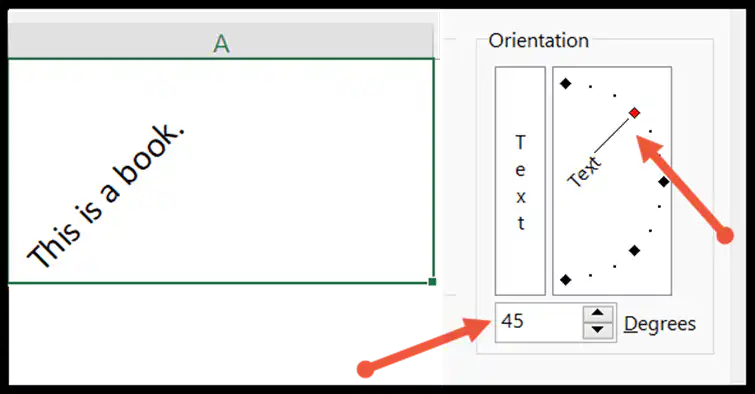
Changing Text Orientation
The text orientation option is also available in the format cells dialog box.
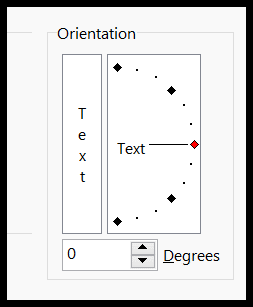
It is used to change the orientation by rotating the text clockwise, counter-clockwise, up, and down. Enter the number from 90 to -90 degrees in the box or you can also use the orientation pointer to change the direction of text and click Ok to apply on the selected cells.
Related Tutorials
- Fill Justify in Excel
- Formula Bar in Excel
- Add a Header and Footer in Excel
- Show Ruler in Excel
- Fill Handle in Excel
- Format Painter in Excel
- Quick Access Toolbar in Excel
- Status Bar in Excel
- Insert Text Box in Excel
- Open Backstage View in Excel
- Activating the Dark Mode in Excel
- Get the Scroll Bar Back in Excel