In Excel, a border is like a four-sided line that is added around the cell or range of cells. It is used to highlight a particular area and separate that from the rest of the values on the spreadsheet.
Inserting a border draws the focus of the readers to the specific section, which enhances their interest in it.
In this tutorial, we will look at the ways to add borders along with their different types in Excel.
Steps to Apply Borders to a Cell in an Excel
- First, select the cell or group of cells where you want to add a border in your spreadsheet.

- Then, go to the home tab and in the “Font” group, click on the border button, which is right next to the bold, italic, and underline options.

- Once you click on the drop-down arrow of the border button, it will show you the list of borders.

- Now, select one from the list that you would like to apply around the selected cells.
Types of Borders in Excel
Here, you will learn about the different borders, which are categorized into 4 sections.
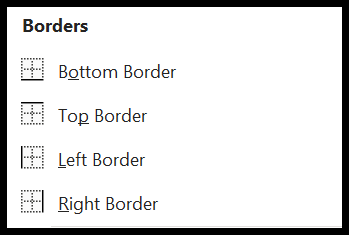
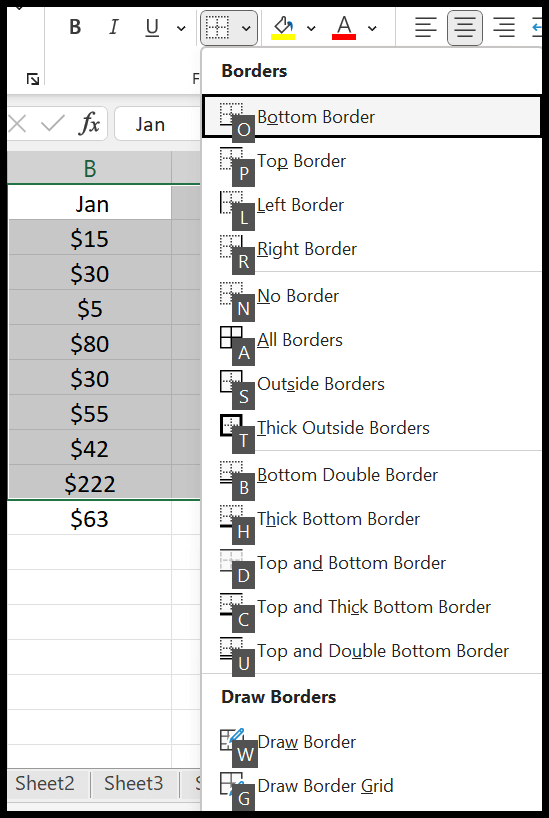
In the first section, there are Bottom, Top, Left, and Right borders. These borders will help you apply only one side border around the single or multiple cells.
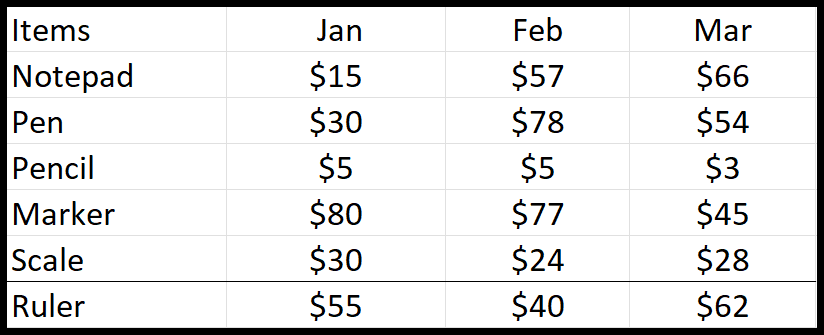
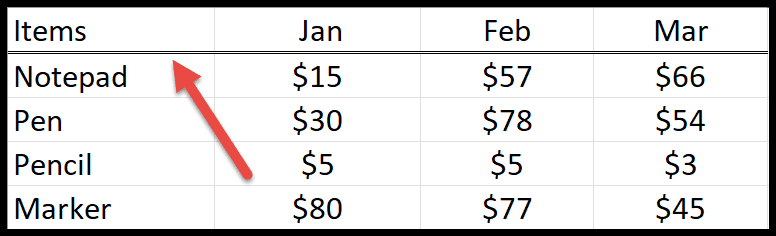
To apply this to the selected values, just click on any type of border. In the following example, you can see the bottom border under the scale.
The second section has no border, all borders, outside borders, and thick outside border options. You can easily remove the border from the selected cell by clicking on the no border option.
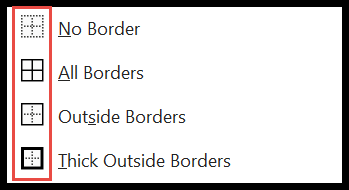
Next, you have the option to add a border to all four sides of the selected cells. But, with all borders, the border lines separate the cell one by one, as shown in the picture below.
The third section contains many bottom borders. Like, as the bottom double border, thick bottom, top and bottom border, top and thick bottom border, and top and double bottom border.

You can use these options in highlighting or underlining important text or headlines.
Draw the Border
In the last section, you have the option to customize or create the border of your choice by using drawing tools. You can also change the existing border with this.
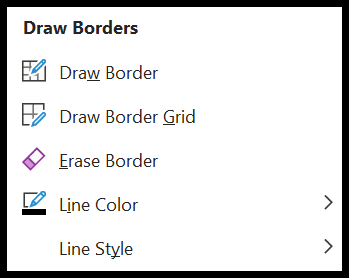
- Draw Border: Once you click the draw border option, it will convert your cursor into the drawing pencil. Now, click on the cell and drag the left mouse button to insert the border. It applies borders in both directions horizontally and vertically.

- Draw Border Grid: From the name justifies, it is also used to draw a border around the selected cells. But the main difference between the “Draw border” and “Draw border grid” is that the border grid draws the borders in the grid form (On Multiple Cells).

- Erase Border: The eraser helps you to erase the unwanted border line from your cells. To erase the border, you just have to drag the eraser on the line to remove it.

- Line Color: The most amazing thing is you can also change the color of the border to make it more attractive. When you click on the line color, then it will open the pop-up with a variety of colors. Once you pick anyone from this, then use the pencil to draw the colorful border.

- Line Style: To change the style of the borderline, click on the line style and choose one from the following styles.

Advanced Border Options
Choose the advanced borders for your selected cells. Follow the below steps:
- First, go to the “More Borders” option, which is at the bottom of the borders list.
- When you click, it will open a new dialog box called “Format Cells”.

- Here, you have more border options to insert on the sheet.
- And, once you select any given preset, it will also show you how it looks after applying it in the box.

- In the end, click “OK” to apply the selected range of cells.

Remove Borders in Excel
- First, you just need to select the area from which you want to remove the border.
- Then, go to the borders list and select the “No Border” option from there.

- Now, the border lines will disappear around the selected cells.

Shortcut to Add Border
There is another way to add a border by using the shortcut. But before using the shortcut, first, you need to select the range where you want to insert the border.
Then, press ALT ⇢ H ⇢ B simultaneously. Once you do this, you will get the list of borders. Along with this, there are some specific options to set any kind of border on a cell or a range.
You would like to set the Thick Bottom Border and the shortcut key for this is H, as you see in the above screenshot. Then, in this case, press ALT ⇢ H ⇢ B ⇢ H after selecting the data.
