When you open the workbook, you will always find the cells at the default height and width, and you can adjust the size of the cells if required.
Cells are part of rows and columns; thus, if you make any cell bigger in any row or column, other cells within the same row or column will also get adjusted.
In this tutorial, we have explained some common ways to make the cells bigger.
1. Make Cells Bigger by Adjusting Row Height and Column Width
You can make the cells bigger by increasing the row height and column width, and for this, you need to follow the below steps:
- First, select the cells that you want to make bigger.
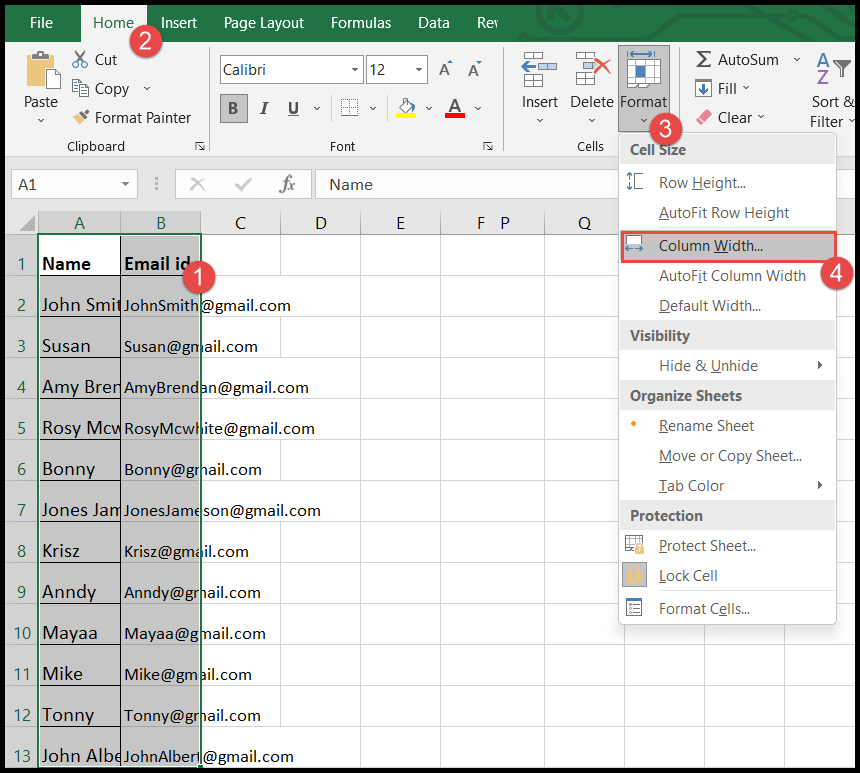
- Once selected, go to the “Home” tab, click on the “Format” icon under the cells group and then click on “Row Height” from the drop-down.

- After that, enter the row height as per your choice and click OK.
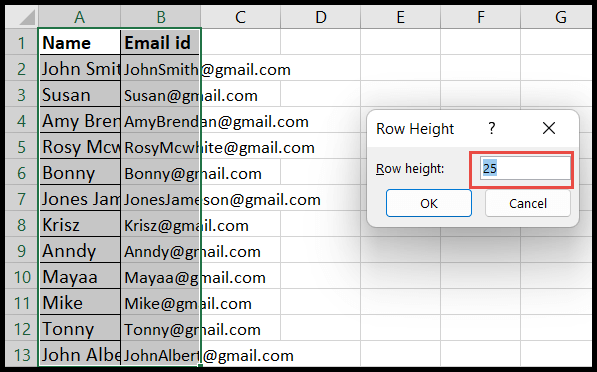
- At this moment, the height of the selected cells got increased.
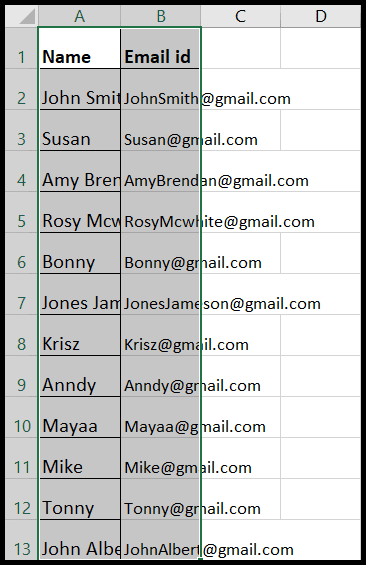
- Again, select the cells and go to the “Format” icon, and this time click on “Column Width” from the drop-down.
- Now, enter the column width as per choice and click OK.
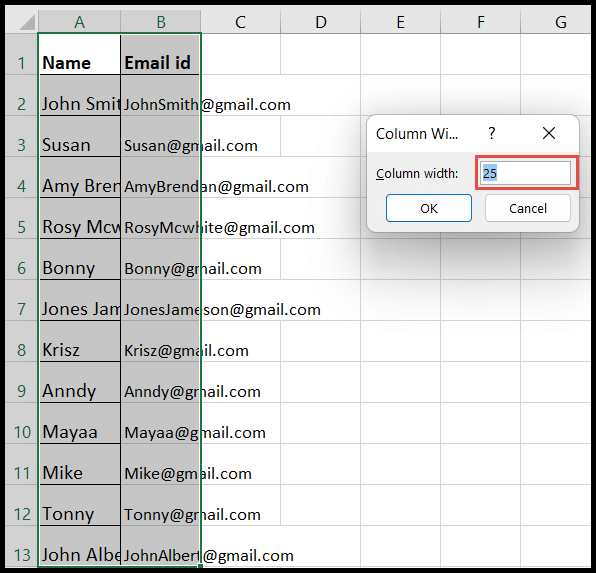
- At this moment, the width of the selected cells got increased which made the size of the selected cells bigger.
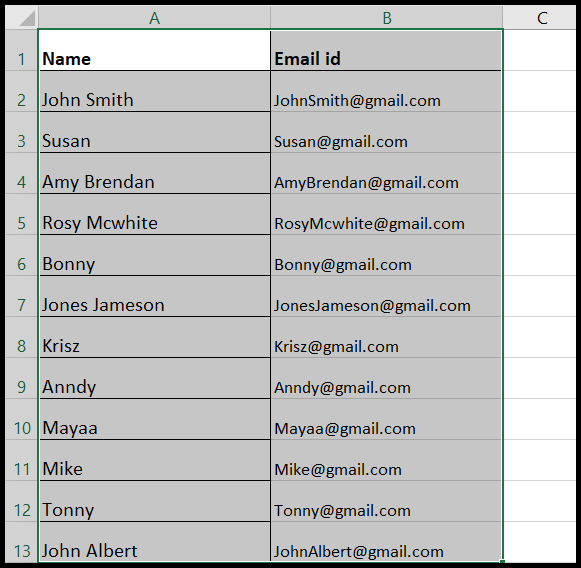
In the above example, we selected the cells that come under two columns (A & B) and within rows (1 to 13) and entered the row height and column width as 25, which made the cells bigger.
You can increase the row height to 409 and the column width to 255.
2. Make Cells Bigger using AutoFit Row Height and Column Width
This autofit option is used to adjust the size of the cells based on the values in the cells.
When you use the autofit feature, the cells are made bigger or smaller based on their value.
- First, select the cells or the entire column wherein the values in the cells are lengthy and/or overlapping and/or partially hidden.
- Once selected, go to the “Home” tab, click on the “Format” icon under the cells group and then click on “AutoFit Row Height” from the drop-down.
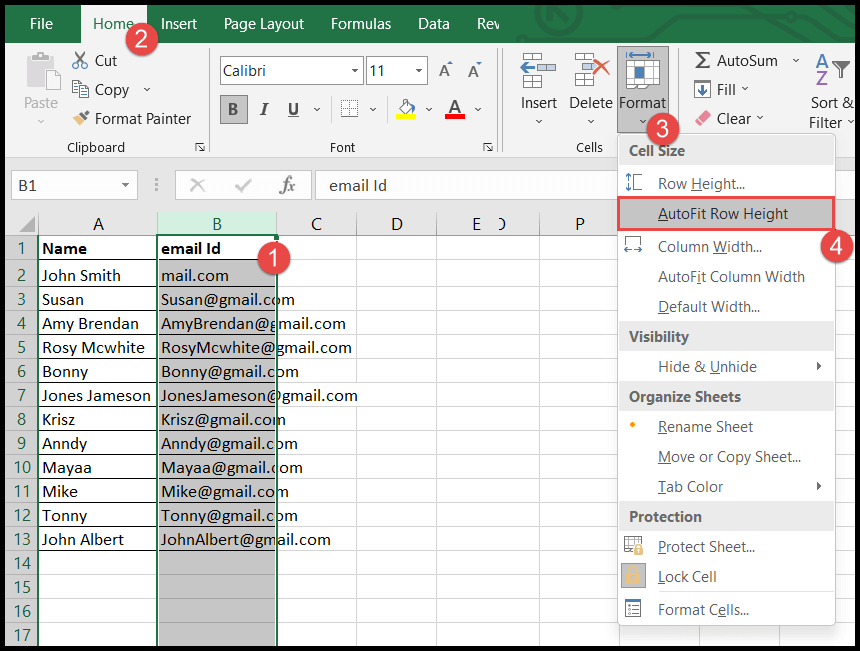
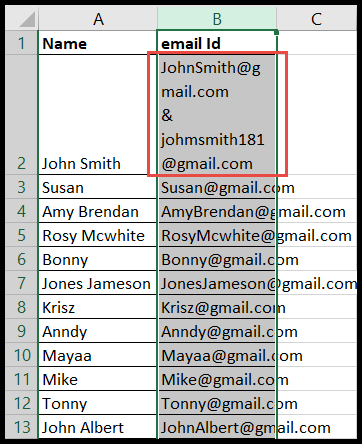
- Once you click on “AutoFit Row Height” it will increase only the height of those cells wherein data is available in lines and is hidden.
- Now, select the cells or the column again and go to the “Format” icon under the cells group and this time click on “AutoFit Column Width” from the drop-down.
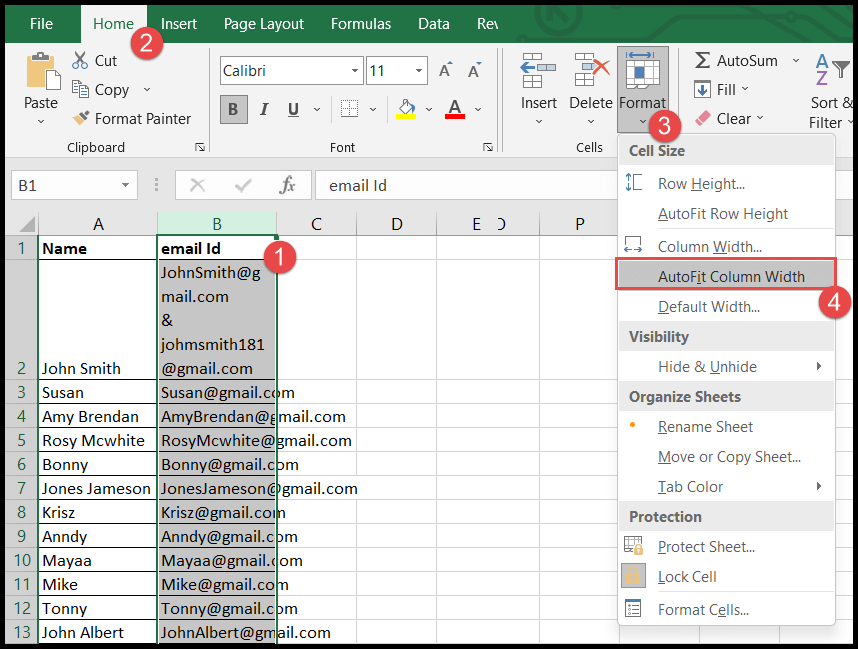
- At this point, all the cells within the column will get bigger up to the size of the lengthiest value that would have in one of the cells from the selected cells in the column.
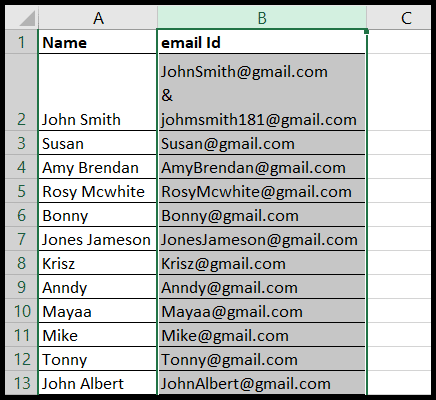
In the above example, AutoFit Row Height only made one cell bigger because only that cell had the hidden value and value stored in lines.
When we used AutoFit Column Width, it made all the cells bigger by increasing their width up to the lengthiest value.
3. Make Cells Bigger Using Wrap Text
Wrap text makes the cells bigger by adjusting the values in the cells, which only increases the cell’s height.
- First, select the cells or the entire column wherein you want to make the cells bigger by using the wrap text feature.
- After that, go to the “Home” tab and then click on the “Wrap Text” icon under the “Alignment” icon.
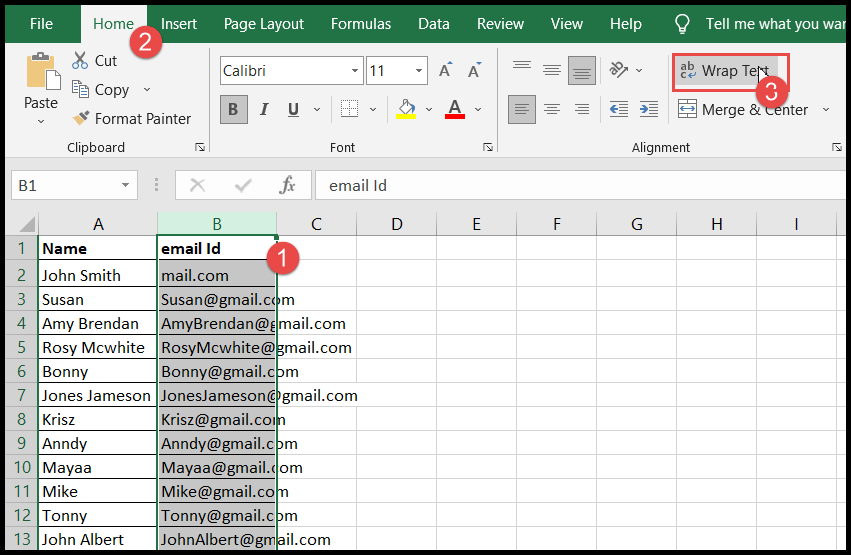
- Once you click on “Wrap Text” the height of the cells will get increased and the value in the cells gets adjusted and cells become bigger except the cells that will have values in lines as we have in cell B2.
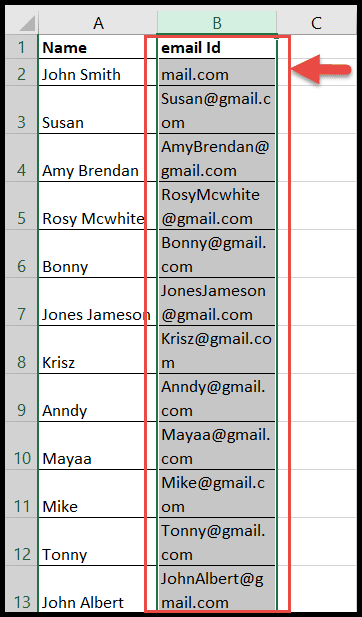
If you find the cells are too big or too small, you can easily adjust the size.
4. Make Cells Bigger Using Mouse
You can also make the cells bigger by increasing the column width and row height using a mouse by placing the cursor on the column header borders and the row number borders.
You can also expand the width and row using the mouse.
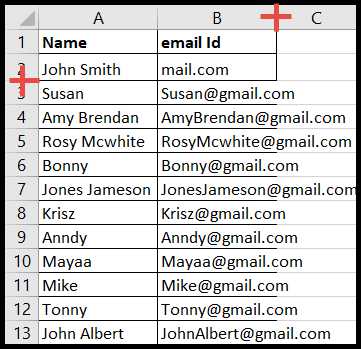
5. Make All the Cells Bigger at Once in Excel
To make all cells big within an Excel worksheet, regardless of whether they contain values, you can adjust the row height and column width settings.
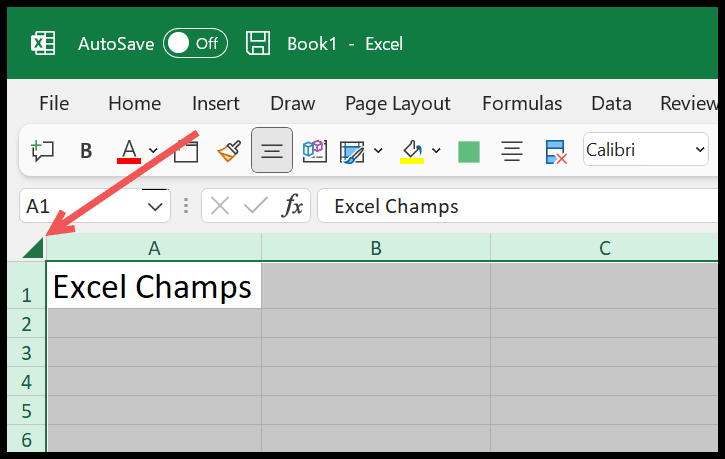
- First, click on the top right corner of the worksheet to select all the cells in one go.
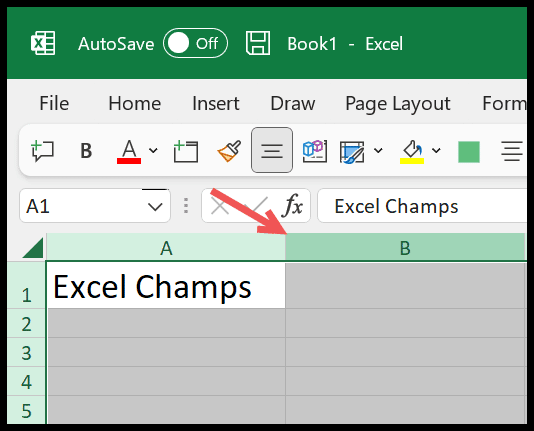
- After that, click on the divider between columns A and B, and hold the click. And by holding your mouse, increase the column width (This will increase the column width of the columns in the worksheet).
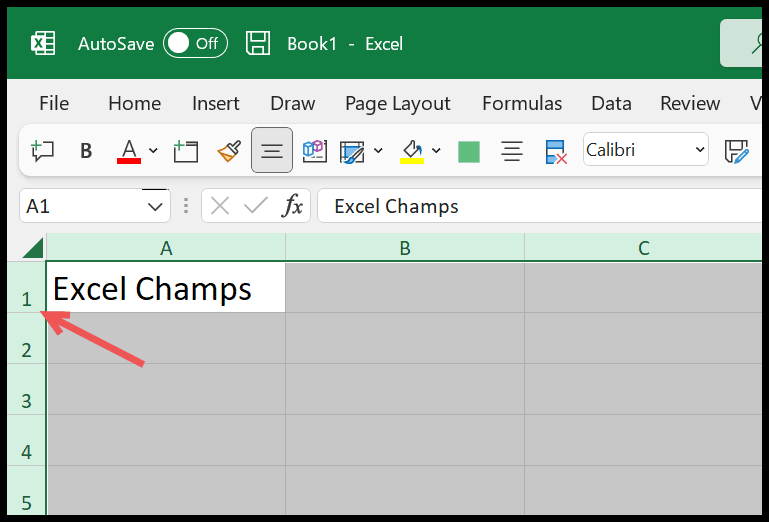
- Next, click on the divider between rows 1 and 2, and hold the click. And by holding your mouse, increase the row height (This will increase the row height of all the rows in the worksheet).
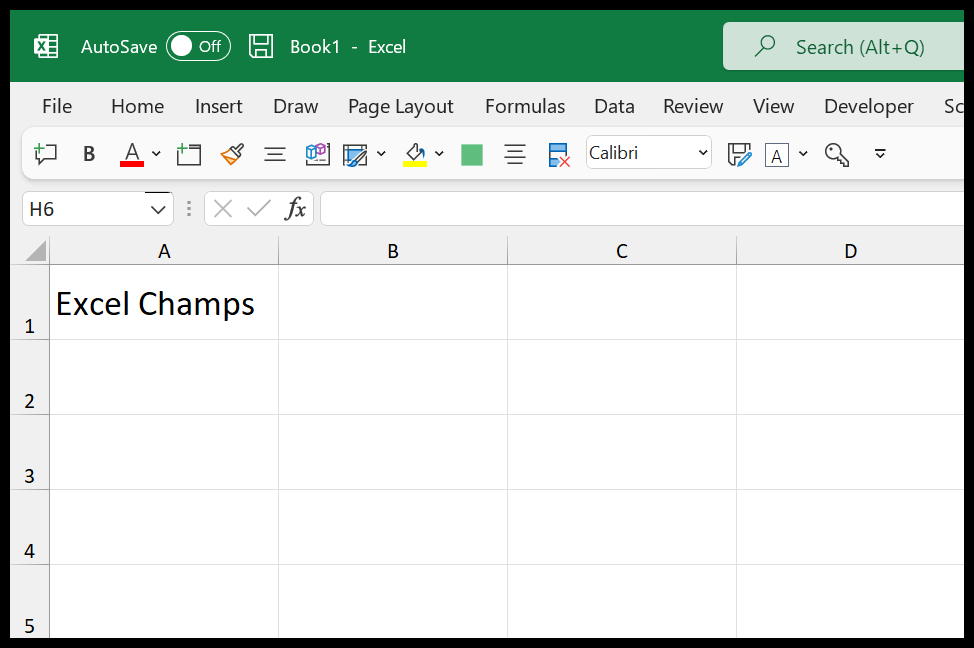
- In the end, click anywhere in the worksheet and de-select the cells.
6. Make Cells Bigger with AutoFit Keyboard Shortcuts
Autofit is a handy feature that can make managing your Excel spreadsheets much easier, mainly when dealing with varying amounts of data.
- To AutoFit Cells Width (Columns): Alt ⇢ H ⇢ O ⇢ I.
- To AutoFit Row Height (Rows): Alt ⇢ H ⇢ O ⇢ A.
- To Enter the Row Height Manually: Alt ⇢ H ⇢ O ⇢ H.
- To Enter the Column Width Manually: Alt ⇢ H ⇢ O ⇢ W.
You can use these keyboard shortcuts with one cell and all the cells of a worksheet. Or, you can also use the AutoFile option from the Home > Cells > Format.

Excel will automatically adjust the size of your selected cells to fit the contents.
7. Increase Font Size to Make Cells Bigger
If you instantly want to increase the size of the cells, you can simply increase the font size of all the cells.
In Excel, the default font is Calibri, which is size 11. And when you increase the font size, it makes all the cells bigger according to the font size.
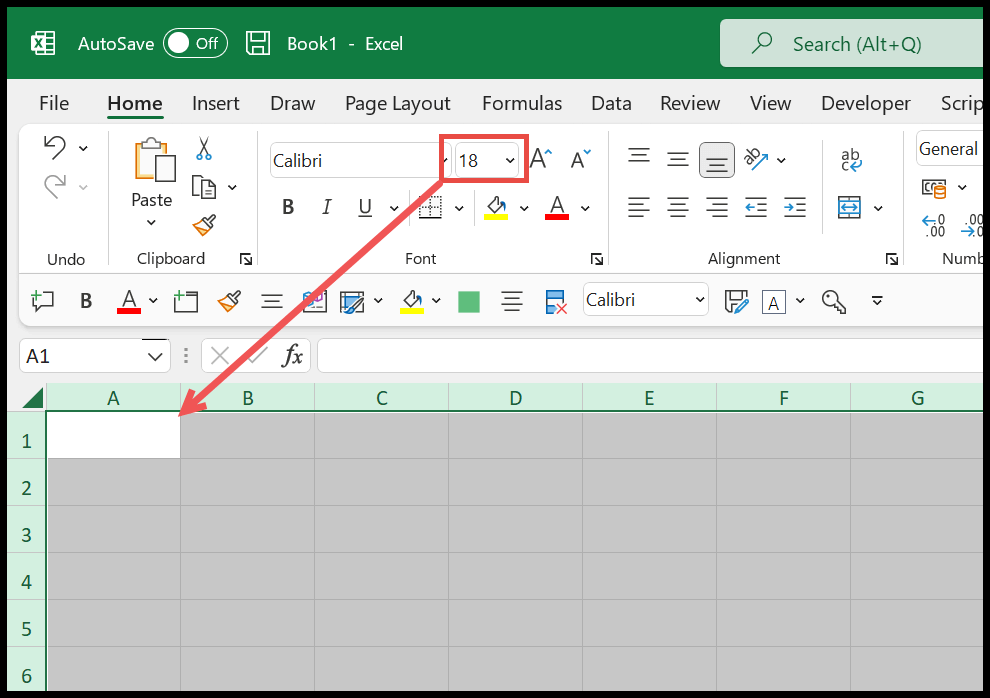
- Identify and select the cells for which you want to change the font size. You can do this by clicking and dragging your mouse across the cells. If you need to select non-adjacent cells, hold down the Ctrl key while selecting.
- After selecting the cells, go to the Home on the Excel ribbon at the top of your screen. This tab houses several options for formatting your Excel worksheet.
- Look for the Font group within the Home tab. This group includes all the options related to text formatting. In the Font group, locate the box that shows the current font size. Next to this box, you will see a drop-down arrow. Click on this arrow to view a list of different font sizes.
- A drop-down of available font sizes will appear. These sizes are based on point measurement. The higher the point number, the larger the font size. Or you can enter a number to use as size for the font.
If your text appears cut off or your cells are wide, you might need to resize your cells.
You can do this by adjusting the column width or row height, which can also be done from the Home tab.
8. Increase Zoom to Make Cells Bigger
If you want to have cells bigger for a better view, you can increase the zoom level of the worksheet.
Just use the zoom scroll from the bottom right of the Excel window.
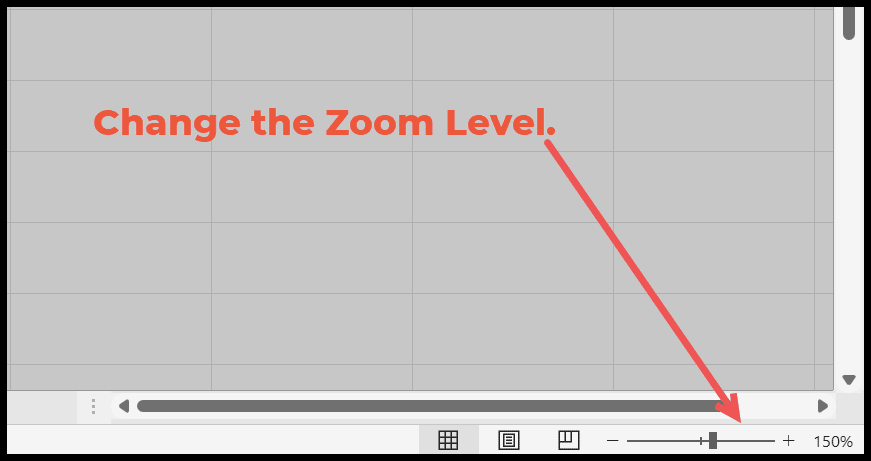
This will only make the cells of the current worksheet bigger.
Notes
In Excel, you can adjust a cell’s size without changing the entire column’s size by using the “Merge and Center” feature.
First, select the cells you want to adjust. Then, click the “Merge and Center” button in the Home tab on the ribbon.

It will allow you to change the selected cells’ size without affecting the entire column’s size.
Remember that merging cells can affect the functionality of certain Excel features, so use this feature judiciously.
How Big Cells in Excel Helps You
The size of cells can impact the readability and clarity of the data presented in them. If cells are too small, content may be cut off or difficult to read.
Conversely, the spreadsheet may become unwieldy and challenging to navigate if cells are too large.
Therefore, knowing how to adjust cell size can significantly enhance your ability to present and work with data in Excel.
It allows you to tailor the presentation of your data to your specific needs and can contribute to more effective data management and analysis.