In Excel, if you have a date and time combined in a single cell, you can separate it into two different values as a date and time. In this tutorial, we will examine some simple and useful methods.
Quick Formulas to Separate Date
- =INT(A1) – It is particularly useful when you want to remove the fractional part of a number. With this, you can remove the time from the date and separate both the date and time.
- =ROUNDDOWN(A1,0) – It is useful to separate time from the date by rounding the fractional part of the number.
- =TRUNC(A1) – It also removes the fractional part of the number and returns the integer portion. It can be beneficial when working with date and time values, as it lets you quickly separate the date from the time.
Quick Formulas to Separate Time
- =A1-INT(A1) – This formula takes only time from date & time and then remove it from original date and time to return you only time.
In the above formulas, A1 is the cell where you have the date and time.
Understanding Date and Time in Excel
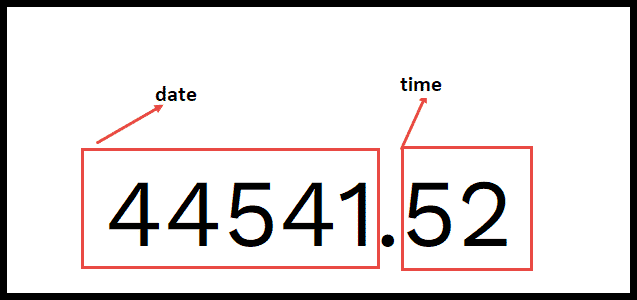
Excel stores a date as a numeric value and time as a fraction.
In the following example, you can see for the date in cell A1, you have the numeric value 44541; for the time in cell A2, it’s 0.52.
And in cell A3, you have a date and time combined in the cells and numeric value 44541.52.
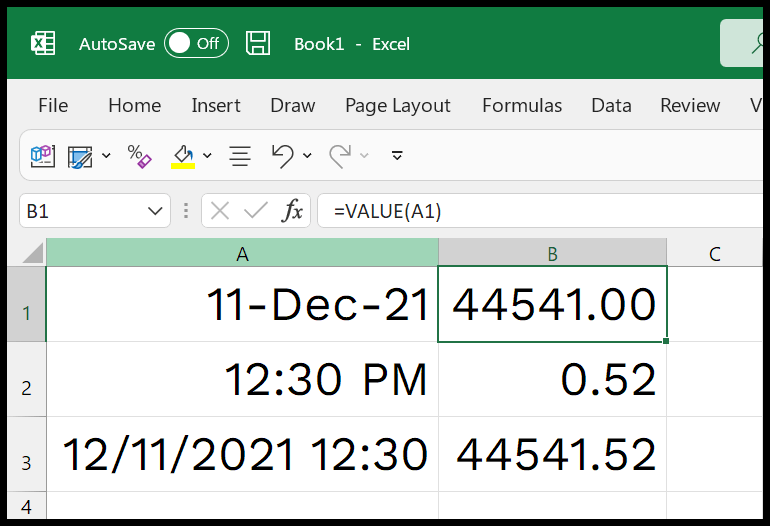
To separate date and time into two values, you must separate the integer and fractional parts from the value.
Why We Require to Separate Date and Time in Excel – When you have data where dates and times are combined, it’s tough to analyze the data day-wise, and it’s tough to analyze the data on an hourly basis. For this, it is always better to separate the date and time values in the data, even though you don’t feel like having them.
Separate Date from Time in Excel
One of the best ways to Separate a date from a date and time value is to use the INT function. The INT function takes an integer from a number and leaves out the fractional part.
=INT(A1)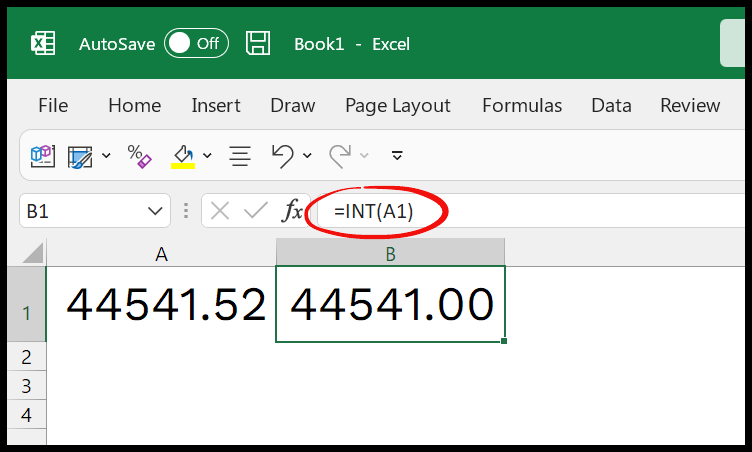
In the above example, you have the INT function that takes the reference from cell A1, where you have the date and time in a numeric value.
And it has returned 44541 as a result.
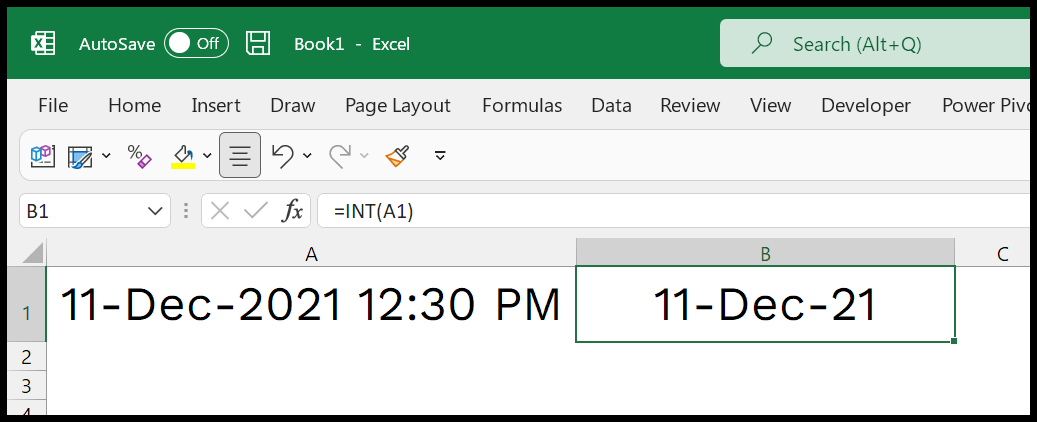
When you format this as valuable as a date, it only shows the date. In addition to the above methods, you can also use the following two functions to get a separate date. Using the ROUNDDOWN function to remove the time from and split the date.
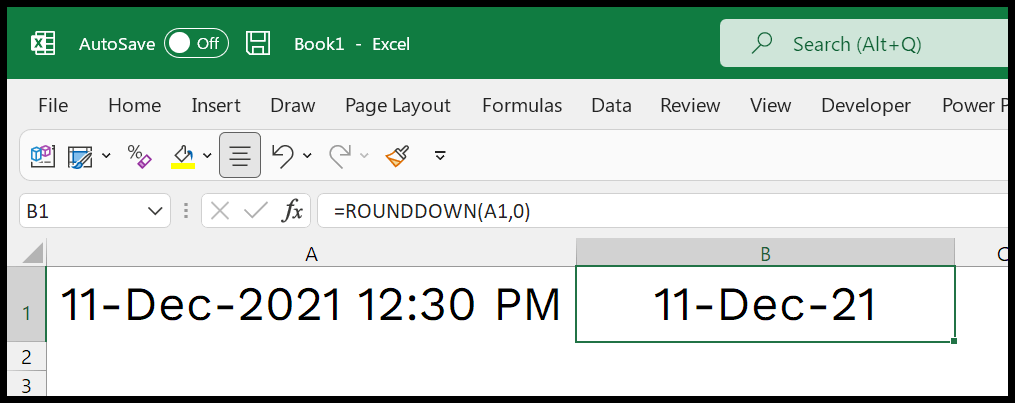
=ROUNDDOWN(A1,0)You can also use the TRUNC function to trim the decimal to separate the date.
=TRUNC(A1)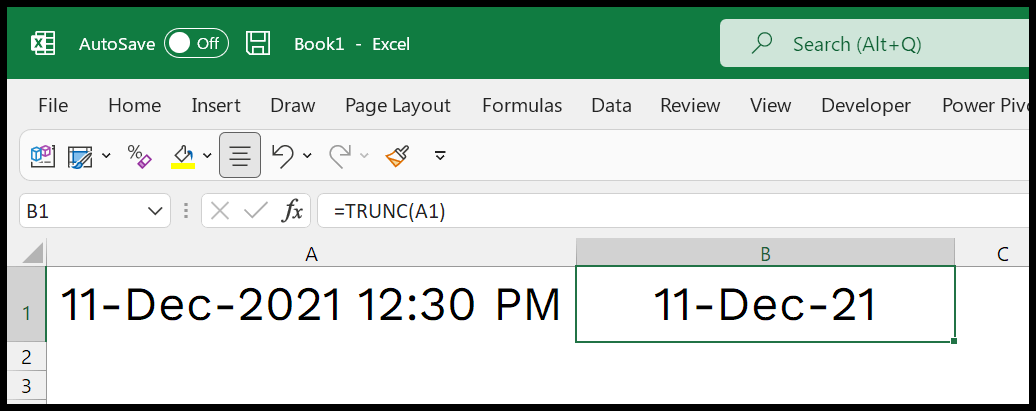
Separate Time from Date in Excel
To separate time, you can use a formula using the INT function. In the following example, you have deducted the integer part from the actual number, and the value left is the time.
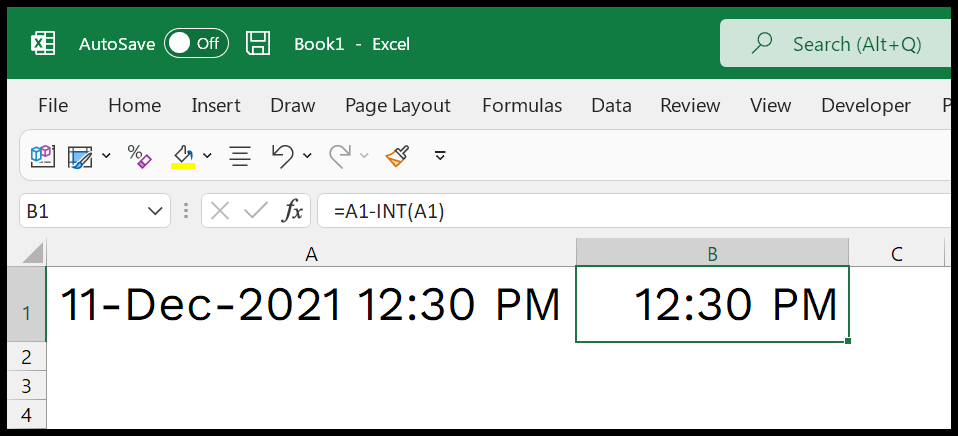
=A1-INT(A1)Separate Date/Time in Excel with Flash Fill
To separate date and time in Excel using the Flash Fill feature, follow the detailed steps below:
- Start by locating your date and time data. For instance, let’s assume this data is in column A of your Excel spreadsheet. This column contains both dates and times together.
- Next, you must create two new columns for the date and time separated. Let’s use column B for the date and column C for the time.
- In column B, click on the cell next to column A’s first date and time entry (B2 if your data starts in A2). Here, manually type the date as it appears in column A, but without the time component. For example, if the cell A2 includes “03/18/2024 4:45 PM”, you would type “03/18/2024” in B2. Excel is usually capable of recognizing this as a date format.
- After typing the date in B2, press Enter. Excel should automatically fill the rest of column B with dates extracted from column A. This is the Flash Fill feature in action. It recognizes the pattern in your manual entry and applies it to the rest of the column, separating the date from the time.
- Now, move to column C. Here, type the time from the first entry in column A, but without the date. Following the previous example, if A2 includes “03/18/2024 4:45 PM”, you would type “4:45 PM” in C2.
- Press Enter after typing the time. Excel will then auto-fill the rest of column C with the time portion of the data from column A.
Common Errors while Separating Date and Time
A few common errors might occur while attempting to separate date and time in Excel.
- VALUE! Error: This error usually occurs when Excel cannot recognize the date or time format. To resolve this, ensure that your date and time are in a format recognized by Excel.
- Dividing by Zero Error: If you use a division operation to separate date and time, you may encounter a ‘divide by zero’ error. Ensure you’re not dividing by zero or any cell containing zero.
- Mixed Data Types: Sometimes, you might have dates and times stored as text and numbers in the same column. Make sure to standardize the data format before you start the extraction process.