

Military time is just 24-hour time without a colon, so 2:30 PM becomes 1430. The cleanest way is a custom format, which changes the display while leaving the cell a real time you can still calculate with: select the cells, press Ctrl+1 → Custom, delete what’s in the Type box, and enter hhmm.
Use hh:mm if you want the colon kept. The formula alternative is =TEXT(A1,"hhmm"), but that returns text — you can’t subtract two of those or use them in a time calculation, which is why the custom format is the better choice in a working sheet.
Going the other way, if someone has typed 1430 as a plain number, convert it to a real time with =TIME(LEFT(A1,2),RIGHT(A1,2),0) — then format it however you like. And to subtract two military times for a shift length, do it on the real time values (=B1-A1) and format the result as [h]:mm; subtracting 1430 from 2200 as numbers gives 770, not 7 hours 30 minutes.
Convert Normal Time into Military Time
You can use the TEXT function to convert a normal time into military time in Excel. In the following example, we have the time in cells A1 and A2. The first time is in AM and the second is in PM.
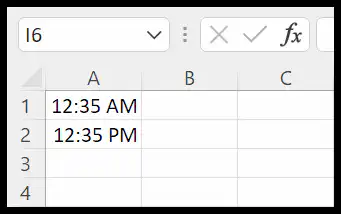
Now by using the text function, you can convert this time into military time and the formula would be as follows.
=TEXT(A1,"HHMM")
In the format argument, you have the “HHMM” format which is without a colon and shows the time as military time.
[thrive_leads id=’112075′]Get Military Time using Custom Formatting
To use the custom formatting, you need to select the cell or the range of cells where you want to get the military time.

- Once you select the cell, use the shortcut key Control + 1 to open the format options.
- Click on Custom to go to the custom formatting option.
- From here, click on the input box and format that you already have there.
- In the end, enter “HHMM” as a format and click OK.
Written by
Puneet Gogia
Microsoft MVP — Excel · Founder, Excel Champs
Twelve years of teaching Excel, and a decade before that using it as a data analyst. Every tutorial here is written from a file I actually built.