

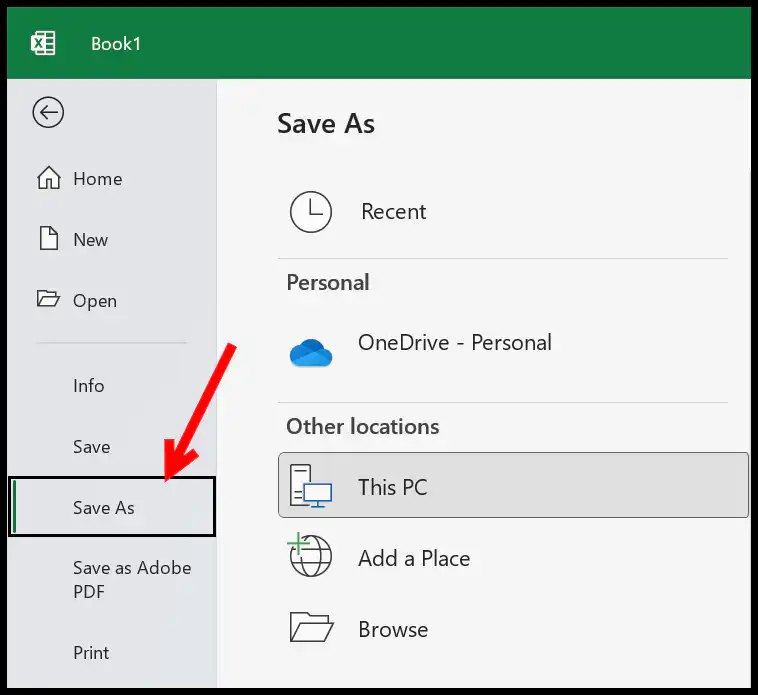
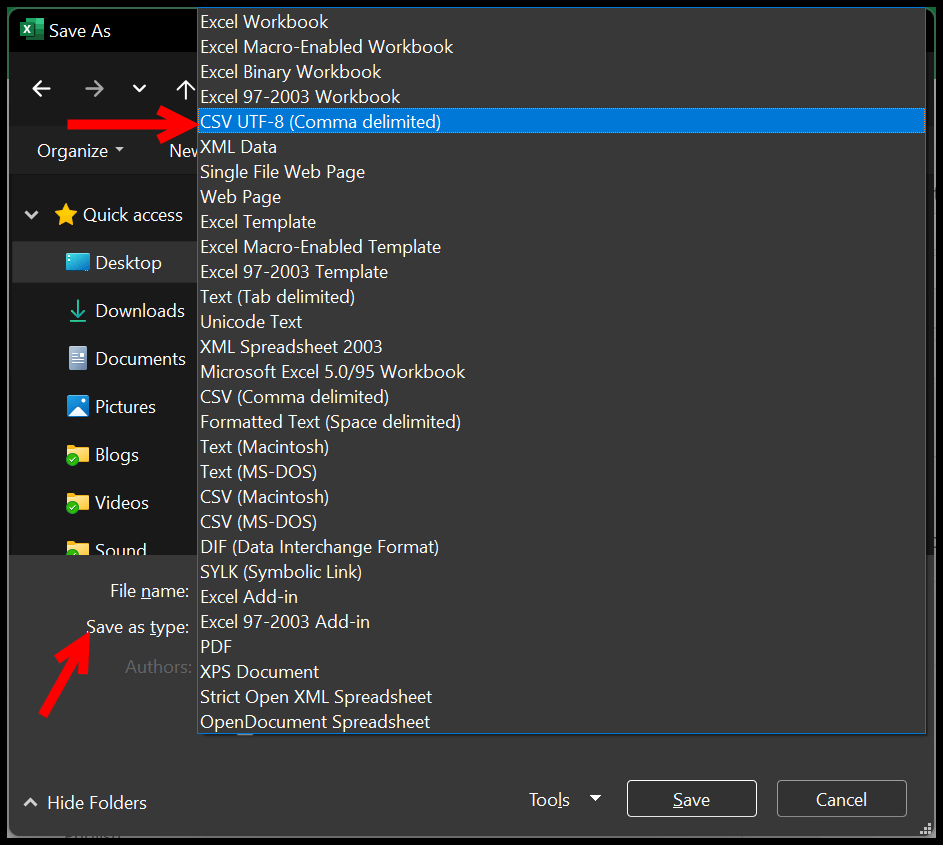
Open the workbook, go to File → Save As (or press F12), pick a folder, set Save as type to CSV UTF-8 (Comma delimited) (*.csv) and click Save.
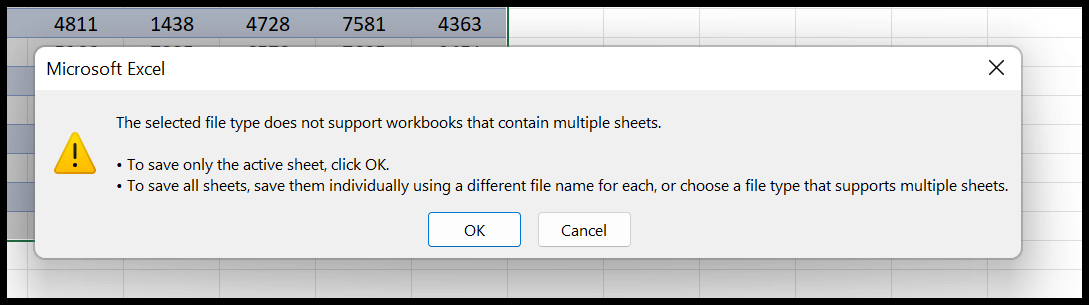
Excel writes only the active sheet to the CSV. For a workbook with several sheets, select each sheet in turn and repeat Save As with a different file name.
Choose CSV UTF-8 when the data holds accented letters, non-English text or symbols such as ₹. The plain CSV (Comma delimited) option uses your system’s code page and can turn those characters into question marks. If CSV UTF-8 isn’t in the list, your version of Excel predates it.
A CSV keeps values only: formulas are saved as their results, and formatting, charts and the other sheets are dropped. After Save As, the window you’re working in is the CSV, so close it and reopen the .xlsx before you make further changes.
Long ID numbers in the General format are saved as they display, such as 1.23457E+15; format them as text or 0 before saving. Check the result in Notepad rather than by double-clicking the CSV, because Excel strips leading zeros again when it reopens the file.
You can save an Excel file in different formats and from all those formats, CSV is quite popular. Yes, you can save your Excel file in CSV format (XLSX and CSV). CSV stands for comma-separated values where values are separated with commas as you can see in the following example.

Save an Excel File (Workbook) as a CSV (Comma Separated Values Format)
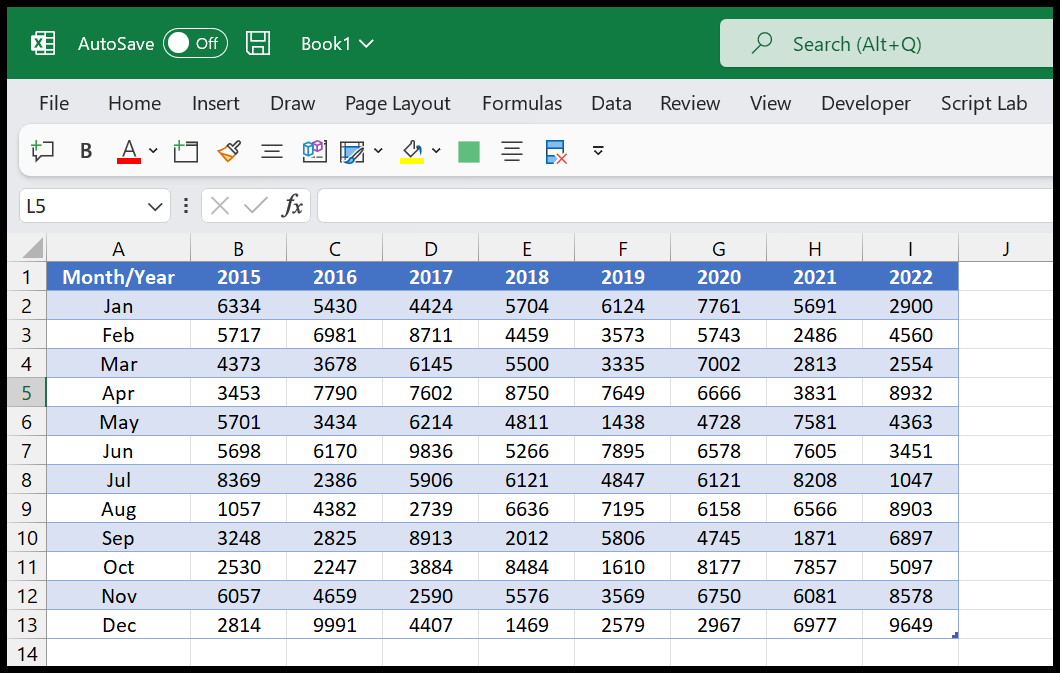
- First, open the file that you want to save in CSV format.
- After that, go to the File Tab, and click on the Save As option.
- Now, specify the location where you want to save the file and from the “Save As Type” select “CSV UTF-8 (Comma Delimited)”
- In the end, click OK to save the file.
Now here you can see you have both files (XLSX and CSV) saved on the desktop. But there is a slight difference between the icons that help you to identify which one is in the CSV format.
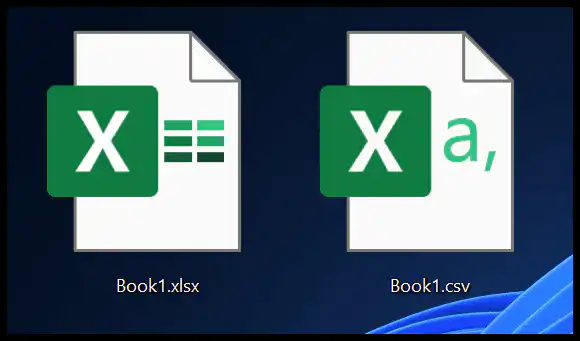
Now once, you save a workbook in CSV format, Excel still allows you to open it as it fully supports CSV format. But it won’t allow you to have formatting on the data and use features like formulas and functions.
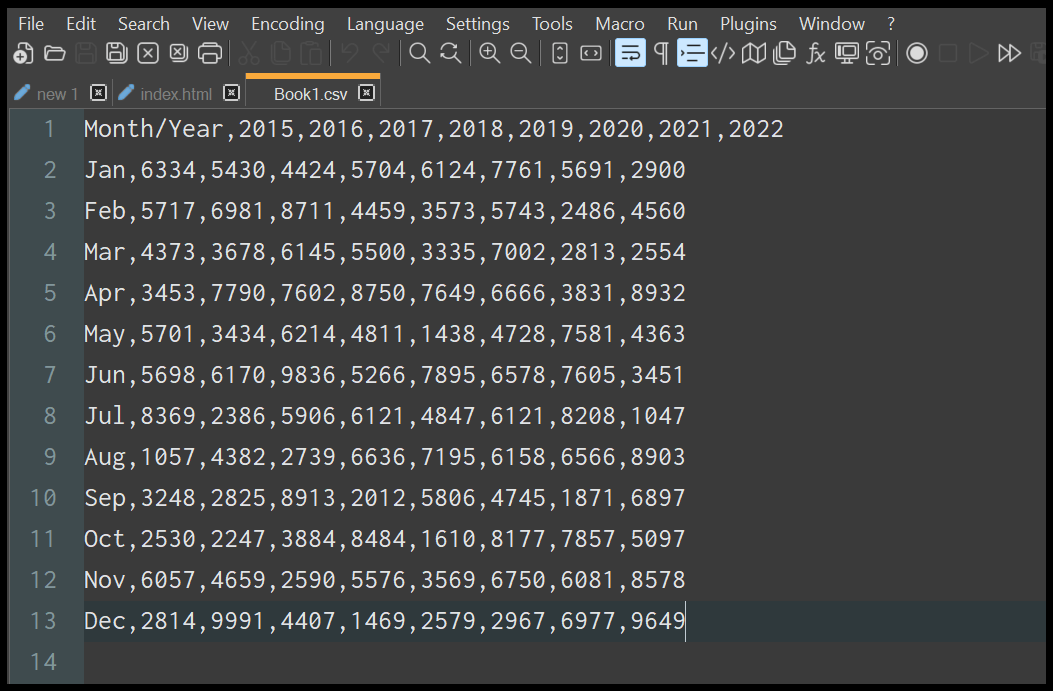
Moreover, when you open the CSV file that you have just saved from Excel with a notepad application, you can see in the following example, it has commas between the values which we have as a table in the Excel format.
There’s one thing that you need to know while converting your file from XLSX to CSV, if the workbook has more than one sheet, Excel will only save the current (active) sheet as CSV. It will ignore the rest of the sheets and you have to save them individually one by one.
VBA Code to Convert an XLSX to CSV
You can also use the following VBA code to save an Excel file in CSV format.
Sub xlsx_to_csv()

Dim myPath As String, myName As String, myTime As String
Dim myAddress As String

myPath = ActiveWorkbook.Path
myName = Left(ActiveWorkbook.Name, InStr(ActiveWorkbook.Name, ".") - 1)
myTime = Format(Now, "DD_MM_YY_HH_MM_SS")
myAddress = myPath & "" & myName & "_" & myTime

ActiveWorkbook.SaveAs Filename:=myAddress, FileFormat:=xlCSVUTF8

End Sub
This code saves the active workbook as a CSV to the same location with the same name using the current date and time.
Related Tutorials

Written by
Puneet Gogia
Microsoft MVP — Excel · Founder, Excel Champs
Twelve years of teaching Excel, and a decade before that using it as a data analyst. Every tutorial here is written from a file I actually built.