Excel Table is a fantastic feature that helps you to manage your data in a structured way. There are a lot of benefits to using an Excel table, and one of those benefits is that you can extend your Excel table.
Well, if I share the exact point here: An Excel Table extends itself, and if you have wanted to do this yourself, you can also do this.
For example, You’re tracking your team’s weekly sales in an Excel table, but suddenly, you need to add more data as the team grows.
Extending the Excel table is an easy way to keep everything organized and updated. This simple method ensures your data is always current and easy to manage.
Auto Extended Excel Table
Excel Table automatically extends itself when you add new data to it. When I paste the new data to the above table, an Excel table, it extends the table range to resize it, including the new data.
When you add new data to the Excel table, it resizes the table and extends formulas, formatting, and filters automatically to the new data, saving you time and effort.
In this tutorial, we will learn how to extend a table that doesn’t extend itself when data is added to it.
Read Also: Rename a Table in Excel
Extend Excel Table with Fill Handle
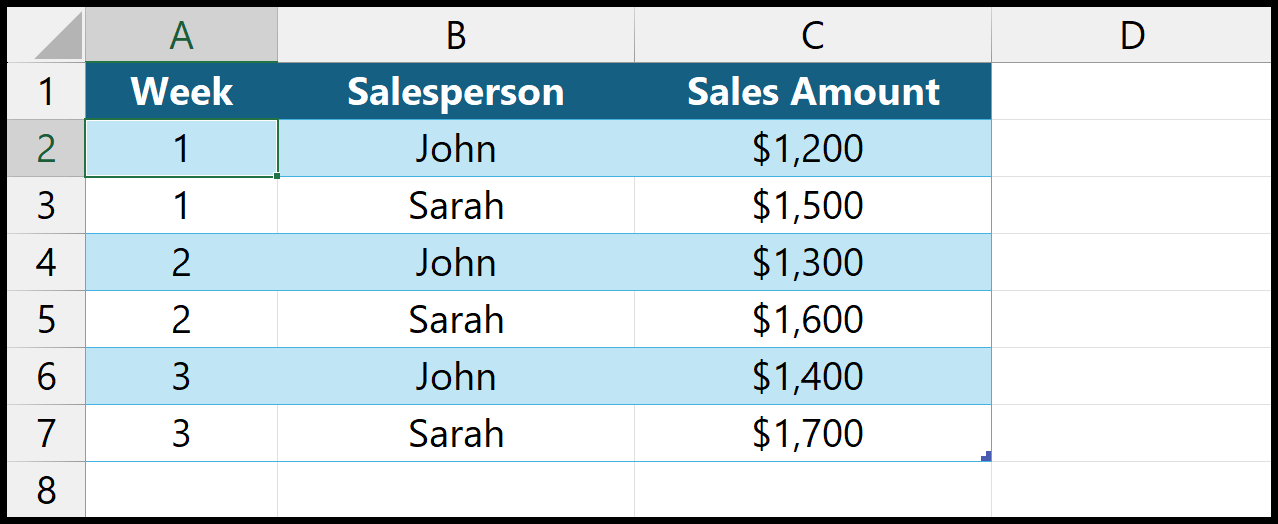
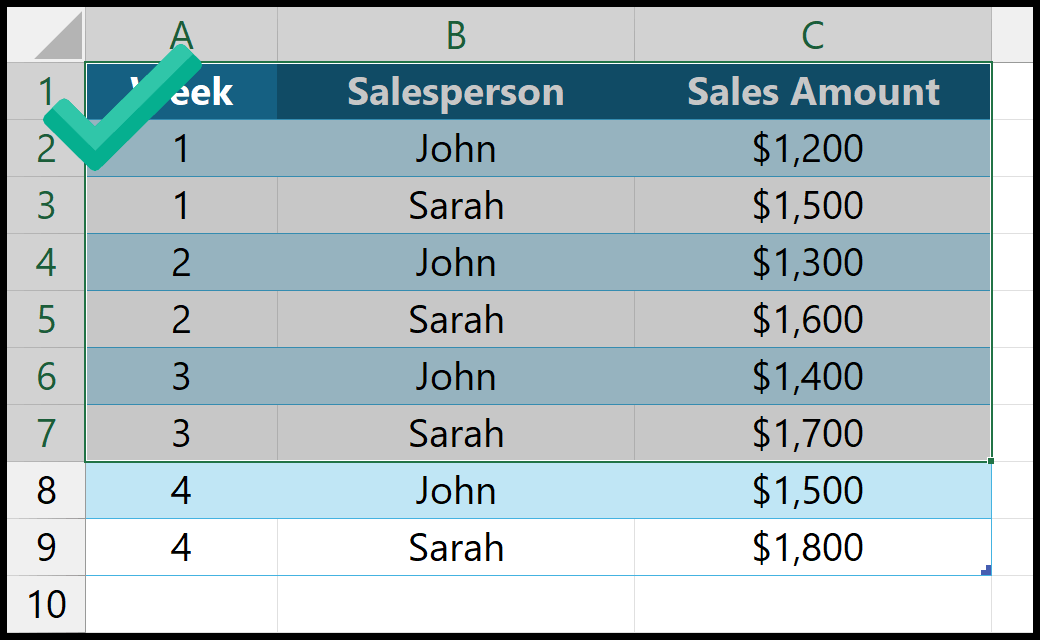
Sometimes, this happens when you add data to an Excel table that doesn’t resize itself. See the example below; when I added the data to the table, it didn’t resize its range of data.
In this situation, the best way is to use the fill handle to increase the table range.
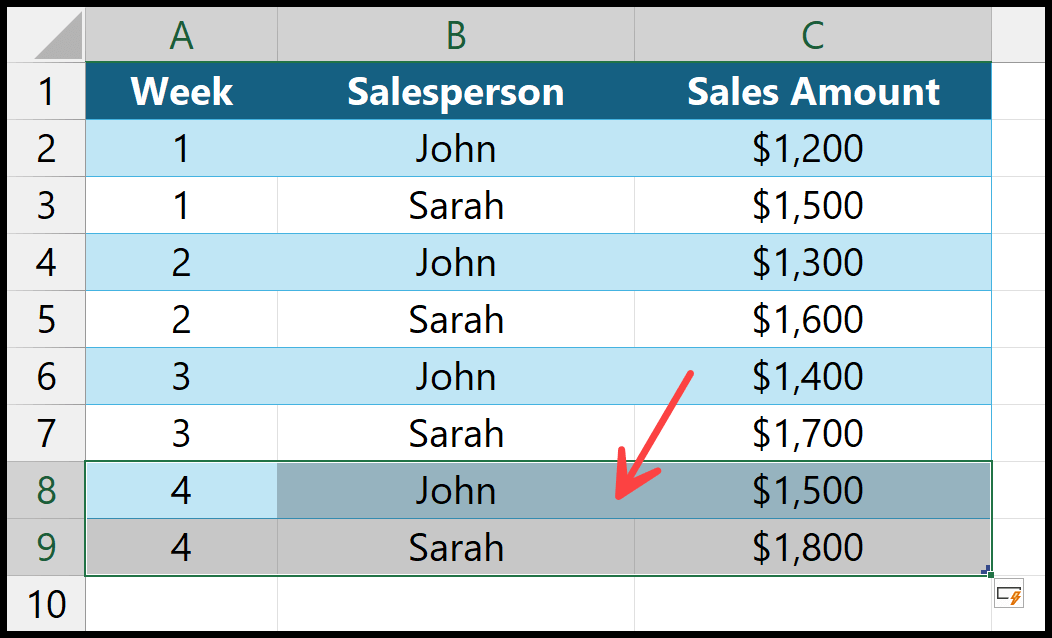
All you need to do is select the entire table, then use the fill handle at the bottom right corner of the table and extend it to the new rows.
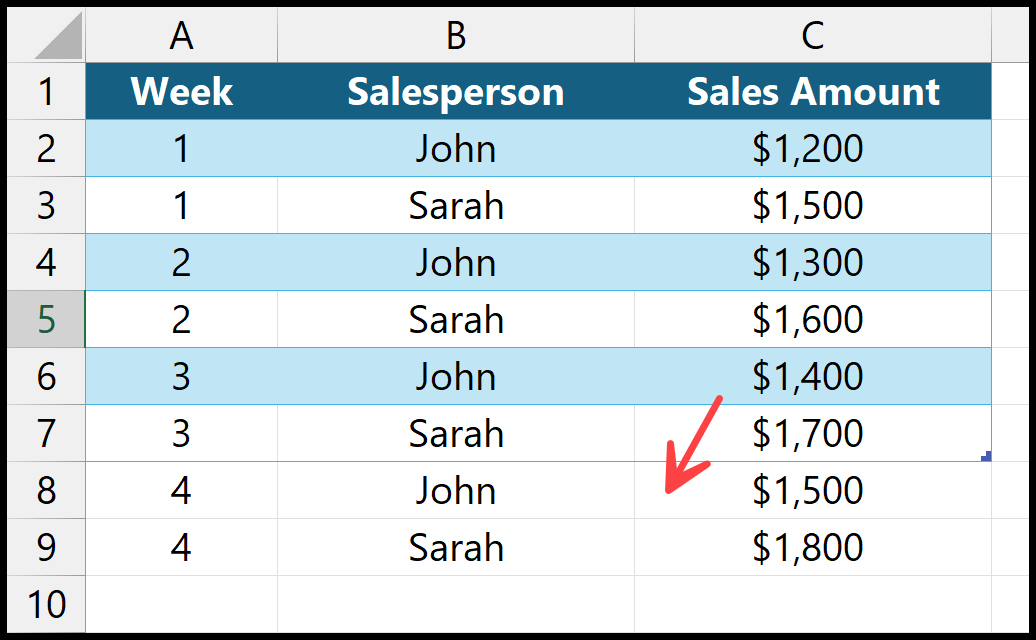
In the above example, we have selected the entire table from the Range A1:C7 and then extended it to two rows down to resize it.
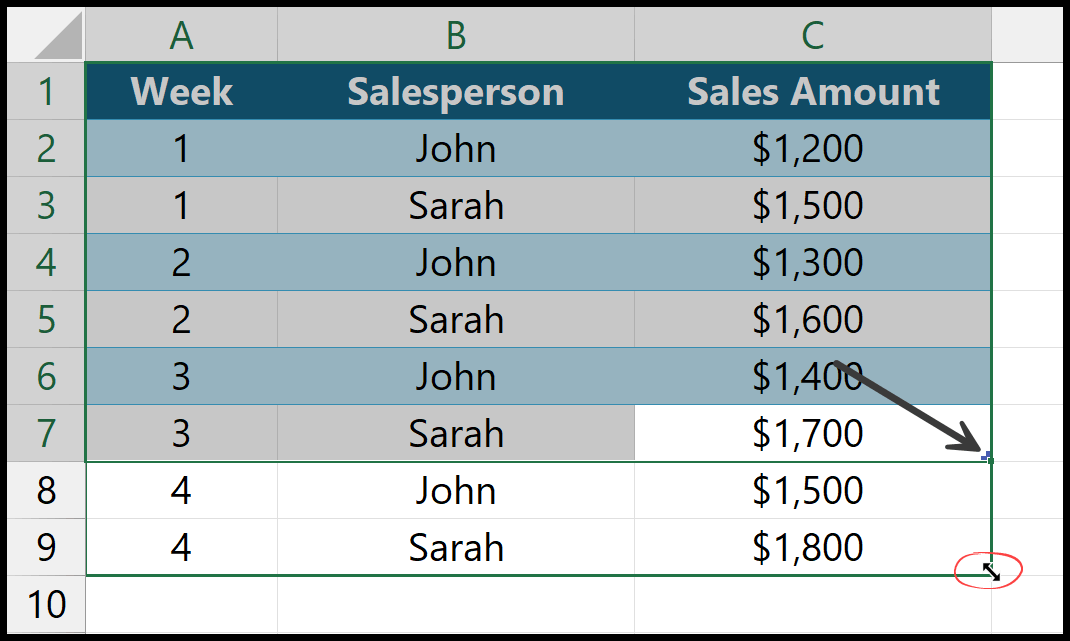
You can increase the table size by adding new columns to it.
When you add a new column or multiple new columns, select the entire table and, using the fill handle, extend it to the right side where you have added new columns.
You need to take care of one thing: You can only extend a table in one way at a time; you can extend it downwards to add more rows or to the right to add more columns.
Read Also: Clear Formatting in Excel
Extent Table Range from Table Design Tab
In Excel, when you use an Excel table, in this case, when you select any of the cells in the table, it shows you a tab on the “Ribbon” where you have the option to edit the table range, and there you change the range to extend the table.
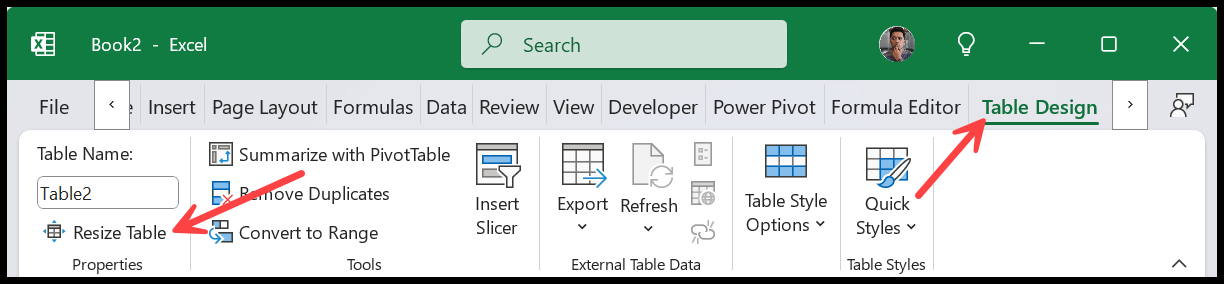
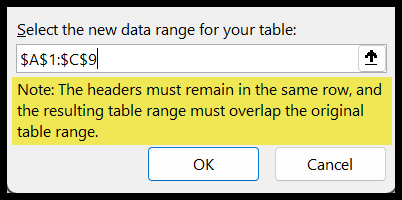
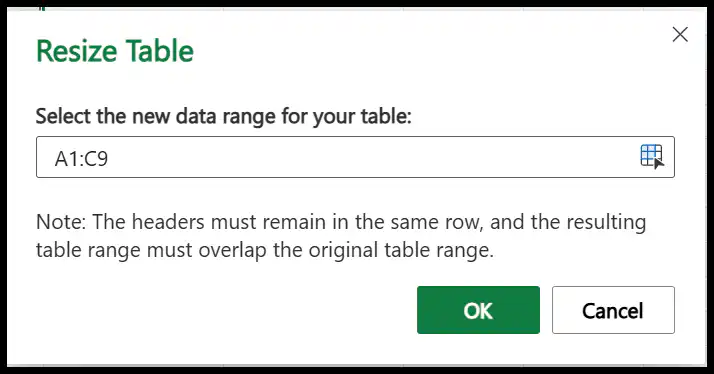
Now, for the table below, when I go to the “Table Design” and click on the “Resize Table” button, it gives you a dialog box to edit the range. You can type or select the range mouse to change. Then, at the end, click OK to apply.

A small note in the dialog box is important for you to understand. It says, “The headers must remain in the same row, and the resulting table range must overlap the original table range.”.
What Does it Mean?
This message means that when you’re adjusting the range of an Excel table, you need to take care of two things:
- Headers Must Stay in the Same Row: The row that contains your column headers (like “Week,” “Salesperson,” and “Sales Amount”) must remain unchanged. You can’t move these headers to a different row, as they are important for identifying the columns in your table.
- Table Range Must Overlap the Original Range: The new Range you select for the table must include at least some part of the original table. In other words, you can’t completely change the table to a different location or select a range that doesn’t include any part of the original table. The new range must cover the existing data and can expand to include more rows or columns, but it can’t be entirely separate from the current table.
If you are using Excel Online (Web Version), you can resize the table using the Table Design tab.
Copy and Paste New Data to Extend a Table
Let’s say you have some data that you want to add to an existing table. In this case, you can copy the range and paste it below the existing table or as a new column on the right side of the table. This way, the Excel table will extend and resize its range by including the new data.
It is one of the easiest ways to add and extend the data table. And even you can insert a new column and a new row within the
VBA Code to Extend an Excel Table
If you have multiple tables in your workbook and want to extend them using a specific number of rows and columns, you can use the code below.
Sub AddRowsAndColumnsToSelectedTable()
    Dim tbl As ListObject
    Dim rng As range
    Dim addRows As Integer
    Dim addCols As Integer
    Dim rowCount As Integer
    Dim colCount As Integer
    Dim tblName As String

    ' Check if the selected cell or range is part of a table
    On Error Resume Next
    Set rng = Selection
    Set tbl = rng.ListObject
    On Error GoTo 0

    If tbl Is Nothing Then
        MsgBox "The selected cell or range is not part of an Excel table.", vbExclamation
        Exit Sub
    End If

    ' Get the table name
    tblName = tbl.Name

    ' Get the number of rows to add from the user
    addRows = Application.InputBox("Enter the number of rows to add:", Type:=1)
    If addRows < 0 Then Exit Sub ' Exit if the input is not valid or cancelled

    ' Get the number of columns to add from the user
    addCols = Application.InputBox("Enter the number of columns to add:", Type:=1)
    If addCols < 0 Then Exit Sub ' Exit if the input is not valid or cancelled

    ' Get current row and column count of the table
    rowCount = tbl.Range.Rows.Count
    colCount = tbl.Range.Columns.Count

    ' Resize the table to add rows and columns
    tbl.Resize tbl.Range.Resize(rowCount + addRows, colCount + addCols)

    MsgBox "Added " & addRows & " rows and " & addCols & " columns to the table.", vbInformation
End Sub
First, it checks if the cell or range you’ve selected is part of a table. If it is, the code then asks you to input the number of rows and columns you want to add.
It resizes by calculating the current size of the table and then expanding it by the number of rows and columns you entered.
The code ensures you the correct number of rows and columns to extend the table without altering the existing data in your table.