

In Excel, you can use a custom order to sort data. For this, you need to use the custom list. There are a few built-in lists that you can use (like days of the week and months), or you can create a new list.
- Create a Custom List
- Sort using the Custom List
Let’s use the data that we have in the example here. In this data, we have a list of names, and we need to sort them based on the age category.

Part-1: Create a Custom List
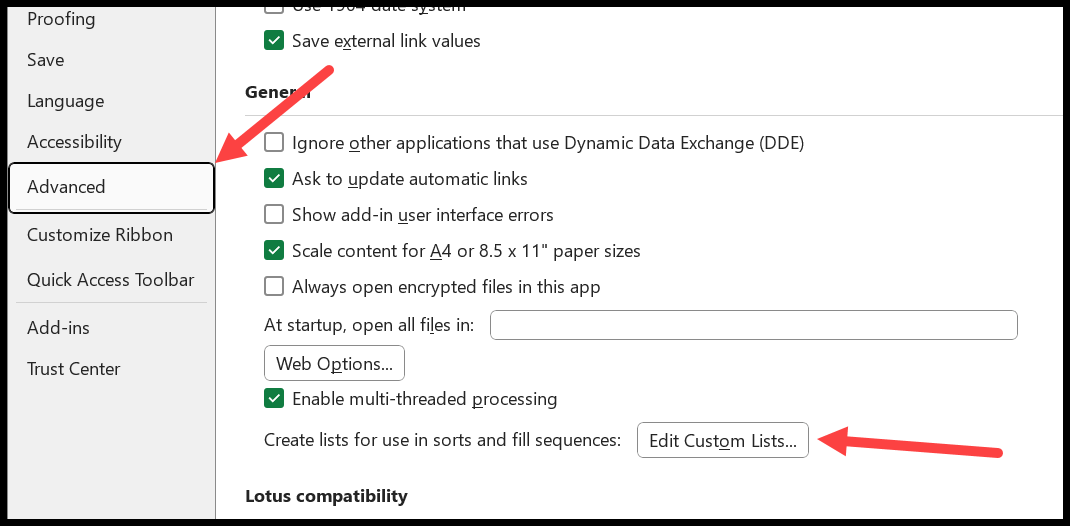
- Go to File > Options > Advanced, scroll down to the General section, and click Edit Custom Lists.
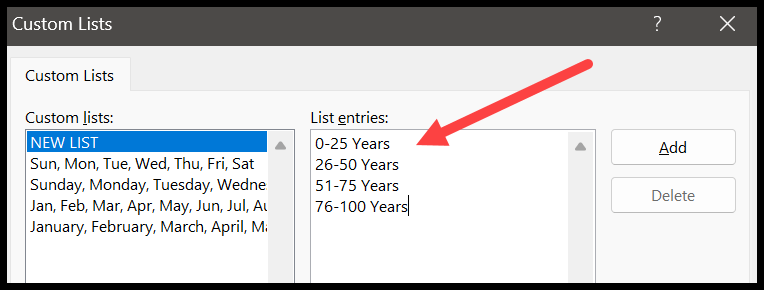
- In the Custom Lists dialog box, enter the list entries in the sequence in which you want to sort the data (one entry per line), and click Add.
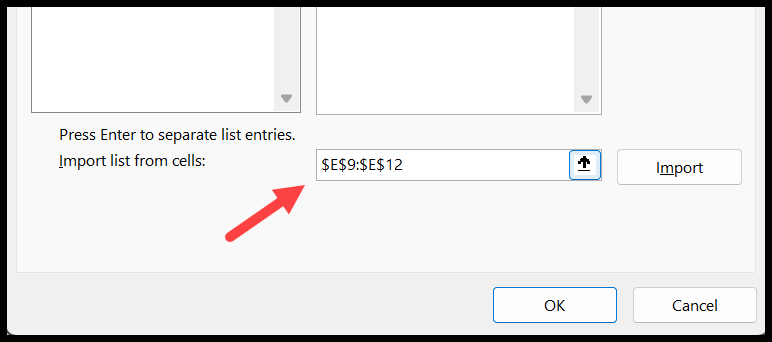
- Or you can also take the entries from a range on the sheet, using the range selection box and the Import button.
- In the end, click OK.
Part-2: Steps to Custom Sort in Excel
- Select the data and open the Sort dialog box with Data > Sort. Or you can also use the keyboard shortcut Alt > A > S > S.
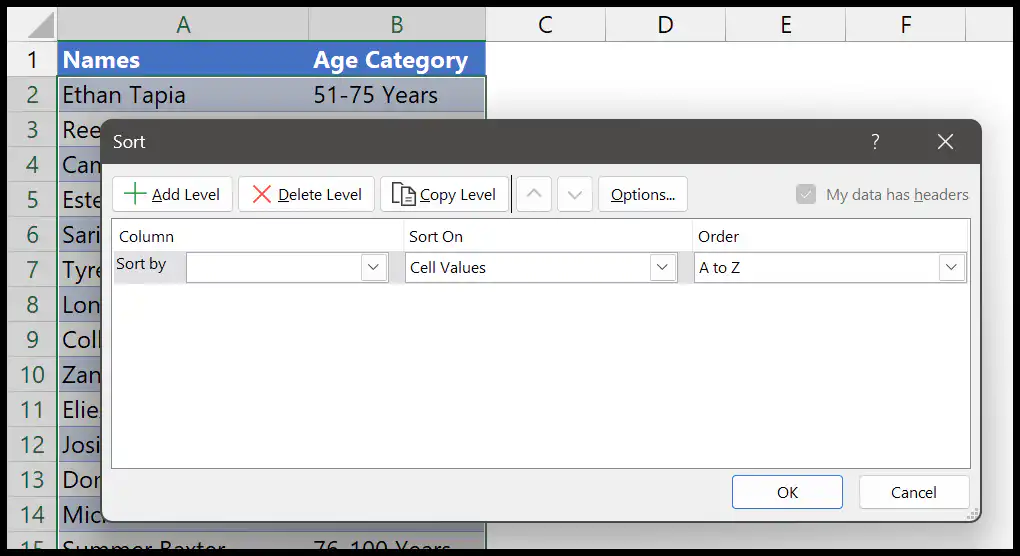
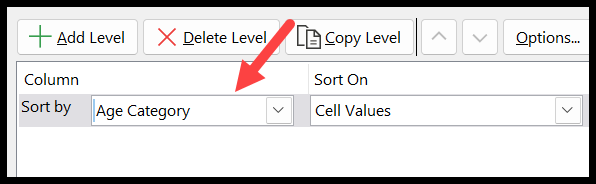
- From the “Sort by” drop-down, select the column “Age Category”.
- After that, from the “Order” drop-down, select “Custom List”.
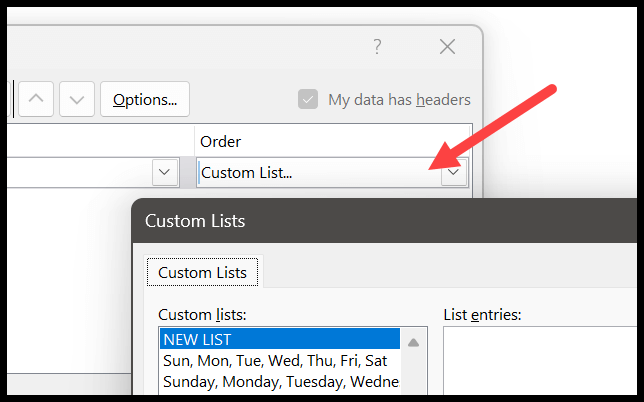
- And then select the new list you have just created.
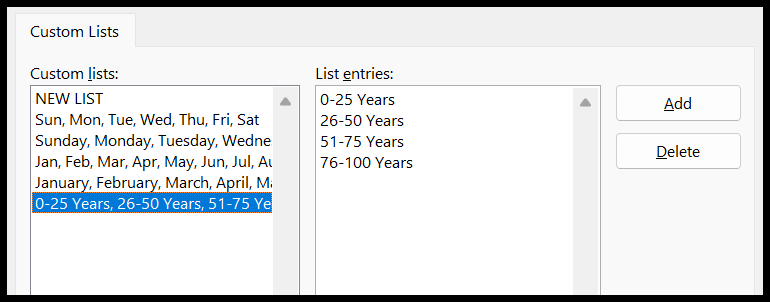
- Finally, click OK twice to sort the data using the selected custom list.
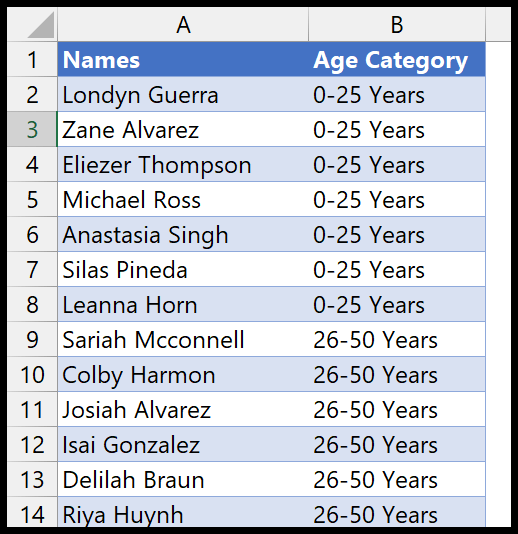
And the moment you click OK, it sorts the data using the age category list you created before sorting.
You can also skip Part-1 and create the list right inside the Sort dialog box. In the Custom Lists window that opens from the Order drop-down, select NEW LIST, type the entries, click Add, and then OK.
Things to Know About Custom Lists
- Saved on your computer: a custom list is saved in Excel on your computer, not in the workbook. On another computer, you need to create the list again.
- Exact text: values that don’t match an entry in the list (or have extra spaces) go to the end after sorting.
- Fill handle: once you create a custom list, you can type its first entry and drag the fill handle to fill the rest of the list in order.
- Mac: on a Mac, custom lists are in Excel ➜ Preferences ➜ Custom Lists.
Custom Sort with a Formula
In Microsoft 365 and Excel 2021, you can also sort in a custom order with a formula, without a custom list. SORTBY sorts the data by the position of each age category in the list you type in the formula:
=SORTBY(A2:B10,MATCH(B2:B10,{"Child","Teen","Adult"},0))
MATCH returns 1 for Child, 2 for Teen and 3 for Adult, and SORTBY sorts the rows by those numbers. The result is a new sorted copy of the data that updates when the data changes.
Frequently Asked Questions
Why doesn’t my custom list appear in the Sort dialog box?
You may have typed the entries but not clicked Add in the Custom Lists dialog box. Open it again from File > Options > Advanced > Edit Custom Lists and check the list is there.
Can I sort by a custom list in descending order?
Yes. When you choose the list from the Order drop-down, Excel also shows the same list in reverse order. Select that one to sort in the opposite order.
How do I delete a custom list?
Open Edit Custom Lists, select your list and click Delete. The built-in lists can’t be deleted.
Written by
Puneet Gogia
Microsoft MVP — Excel · Founder, Excel Champs
Twelve years of teaching Excel, and a decade before that using it as a data analyst. Every tutorial here is written from a file I actually built.