Custom lists in Excel are lists that users can create per their requirements and use to fill the cell ranges automatically and sort the data based on those lists. The custom list feature is very helpful for users who mostly work on similar data sets.
Users can create their custom lists like employee names, student names, client names, department names, Priority, etc., and you use those lists to autofill the data range using the.
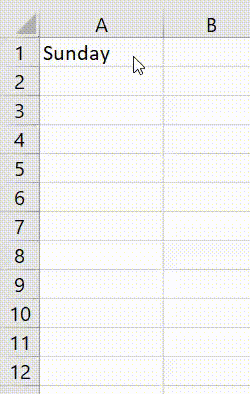
Excel, by default, has two pre-defined inbuilt custom lists of week names and month names.
When you want to enter the names of weeks or months in the cells, you have to just enter the first name in the cell, like Sun or Sunday for the week names and Jan or January for the month names.
You can autofill rest days or month names using the fill handle.
Steps to Create Custom Lists in Excel
you can create your own defined custom lists by following the below steps:
- First, go to the “File” tab.

- Then click on “Options” to open the “Excel Option” dialog box.

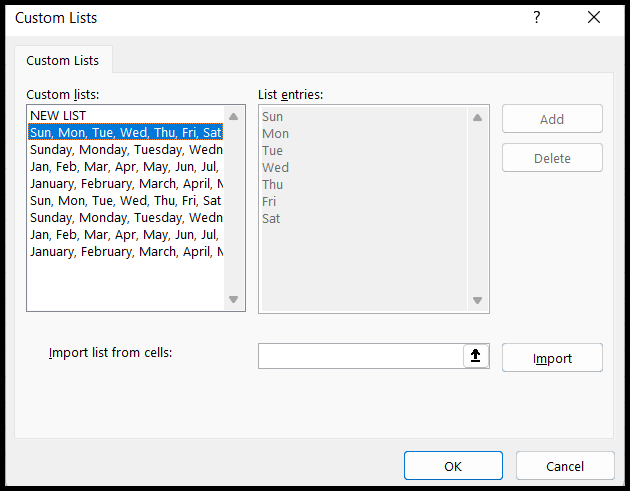
- After that, click on “Advanced” and then scroll down from the right-side scroll bar to “General” and then click on the “Edit Custom Lists” option.

- Once you click on “Edit Custom Lists”, you will get the “Custom Lists” dialog box opened to create the custom lists.
- Here, click in the “Import list from cells” field and select the listed range if you have any already created or enter the name of the “name range” if any is created and then click on the “Import” button to import the list.
- Or you can enter the list manually in the “List entries” box.
- After you are done with the import list or manual list, click on the “Add” button and then click OK.
- Now, you have your custom list created and it is started reflecting under the in-built Custom lists.

- At this moment, your custom list is now ready to be used to autofill using “Fill Handle”.

Sort Data Using Custom Lists
Normally you can sort the data alphabetically from A to Z or from Z to A and numerically in ascending or descending order.
Still, many of us would not know that you can also sort the data based on your custom list sequence.
Understand the “Sort data using custom lists” feature using the custom list we created in the above steps.
- First, go to any cell within the data set and click on the “Data” tab and then click on the “Sort” icon under the “Sort & Filters” group in the ribbon.

- After that, choose and select the column header in the “Sort by” field.
- Now, click on the “Order” field drop-down arrow and click on “Custom List” and then choose the list which you want to use for sorting the data and click OK.

- At this moment, your data will get sorted based on the custom list sequence.

You can see in the above image the data got sorted based on the custom list sequence, not alphabetically from A to z or Z to A.
Delete or Remove Any Custom List
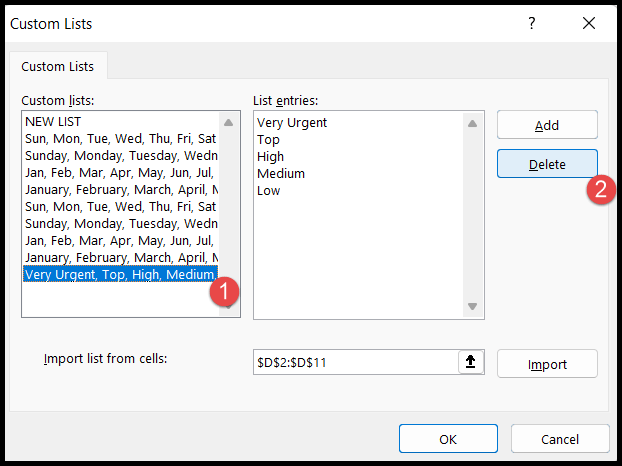
- To delete the custom list, open the “Custom Lists” dialog box.
- After that, click on the list you want to delete and then click on the “Delete” button, and in the end, Click OK.
You cannot remove the pre-defined in-built custom lists (Week and Month names) in Excel.