In Power Query, you can use the function and formulas almost as you use in a worksheet. Power Query has a long list of functions, and you can write formulas using different functions or calculation operators.
And in this tutorial, we will understand functions and formulas in detail.
Writing Your First Formula in Power Query
In Power Query, unlike Excel, you need to add a new column to enter a formula. However, you can enter it in a single cell. Let’s understand it with an example. Below we have some values in the columns A and B.
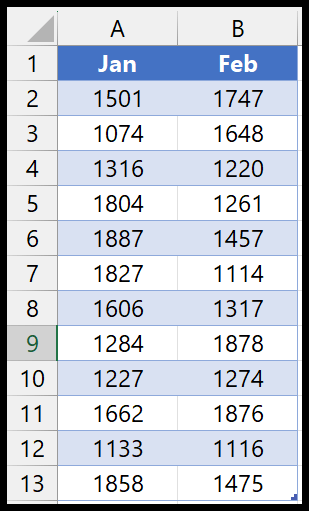
And now, insert a new column with the total of both columns. To get this you can is use the below steps:
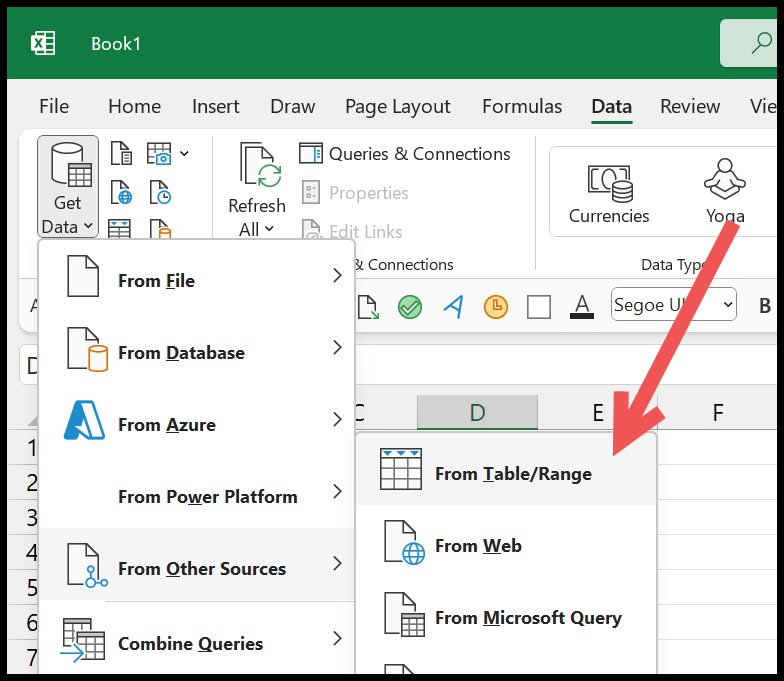
- First, load the data into the power query editor (Data Tab > From Other Sources > From Range/Table).
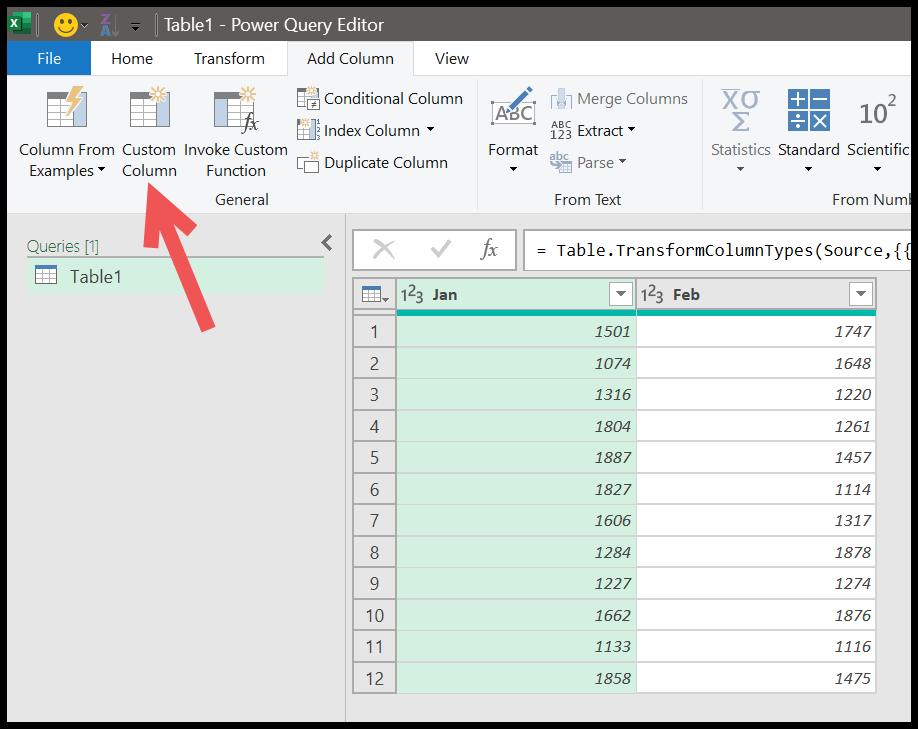
- In the editor, you need to go to the Add Column Tab and click the Custom Column button to open the dialog box.
- From here, in the dialog box, you must enter the formula you want to use. The equal to sign is already there, so you don’t need to enter it.
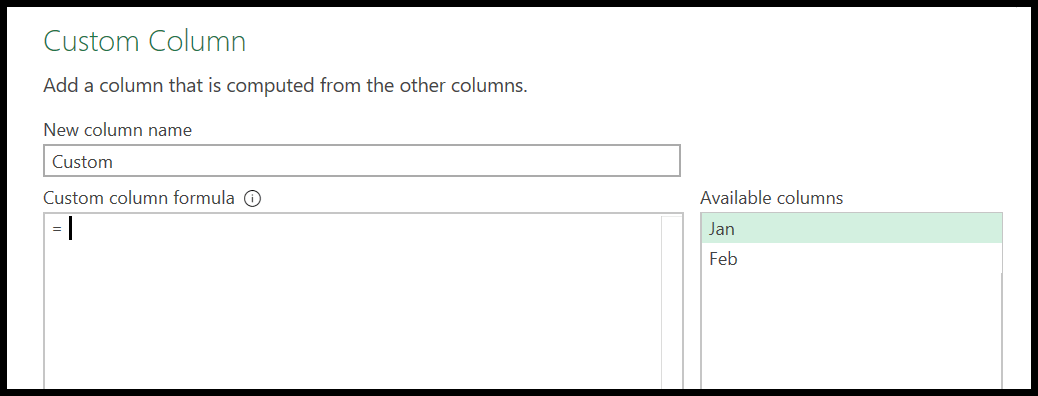
- Next, you need to write the formula:
- Click on the Jan in the available columns to enter it in the formula.
- Enter the plus (+) sign.
- Click on the Feb in the available columns to enter it in the formula.
- Also, type a name for the column.
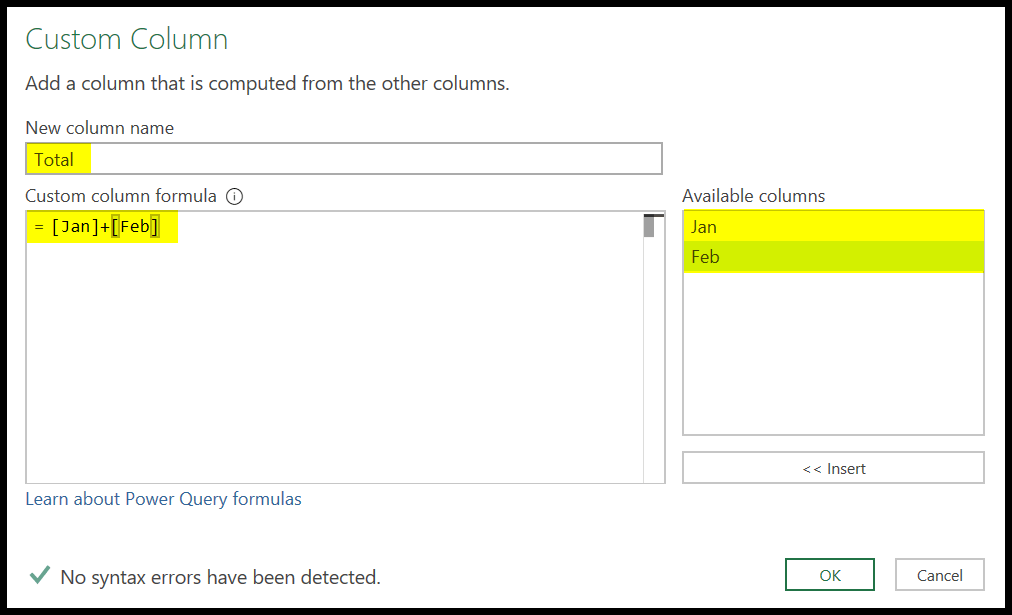
- In the end, click OK to enter the formula with a new custom column.
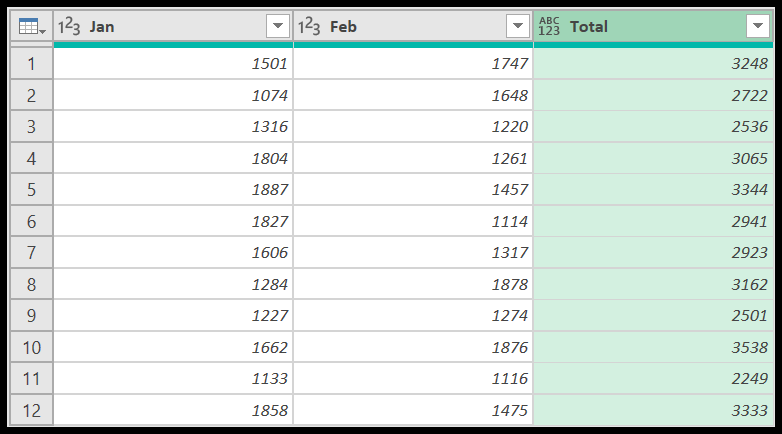
The moment you hit enter, it enters a new column with the sum of columns A and B (Jan and Feb).
In the end, click the close and load button from the home tab to load data back to a new worksheet in Excel.

And once you click on it, it will close the power query editor and load the data by inserting a new worksheet.
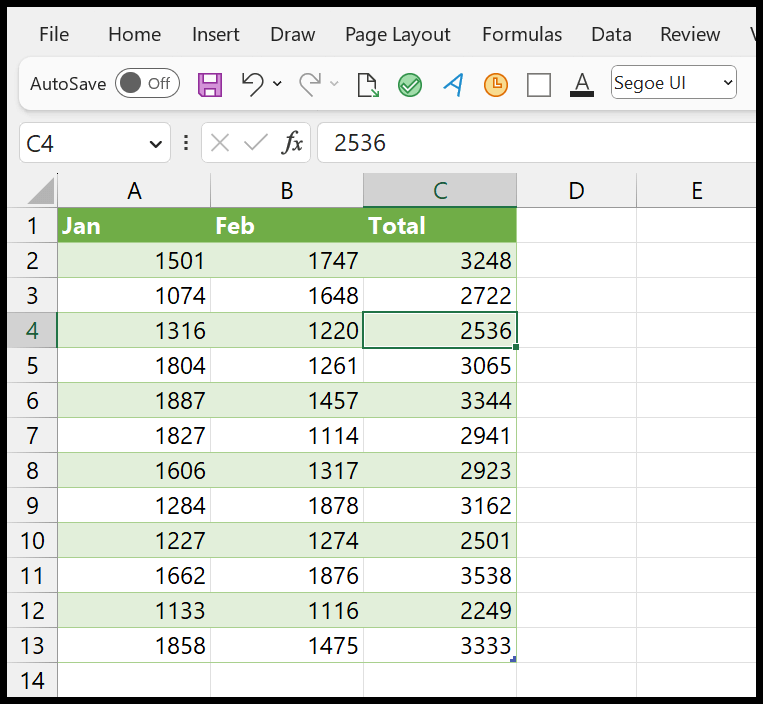
As the power query in real-time, you get all the new values in that table when you enter new values into the source data and refresh the new table that you have loaded back from the power query editor. So even the calculation for the new values will also be done when you refresh.
Editing a Formula
Once you write a formula in the Power Query, you can edit it.
- First, select one of the cells from the new table and get to the “Query” tab from the ribbon.
- And then, click on the edit button.
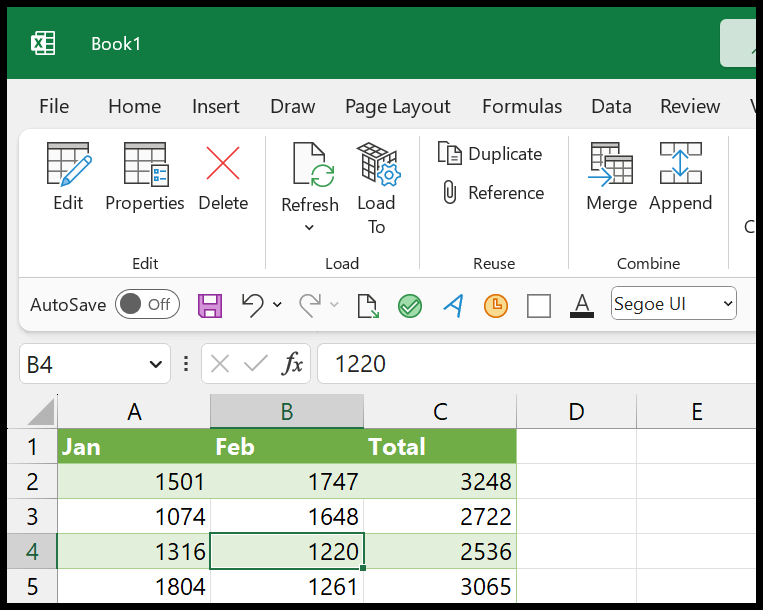
Once you click the edit button, it opens the power query editor.
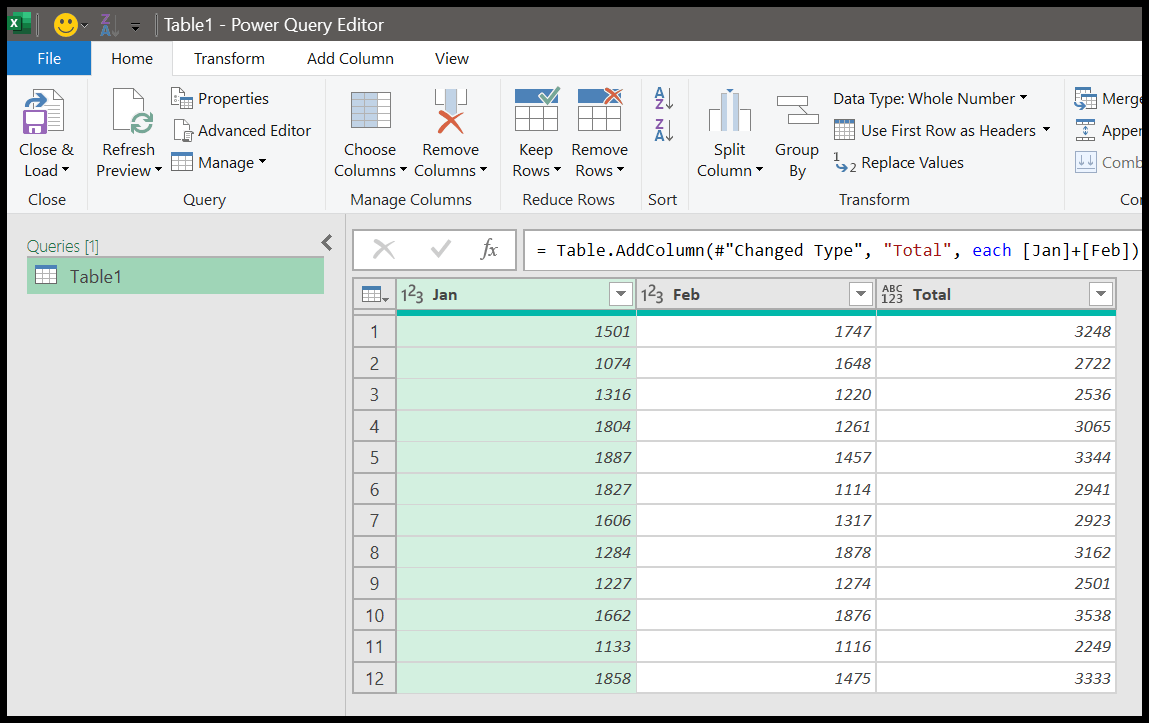
From there, you need to go to the right side of the window where you have the “Applied Steps”.
And then click on “Added Custom” to open the custom column dialog box where you initially enter the formula.
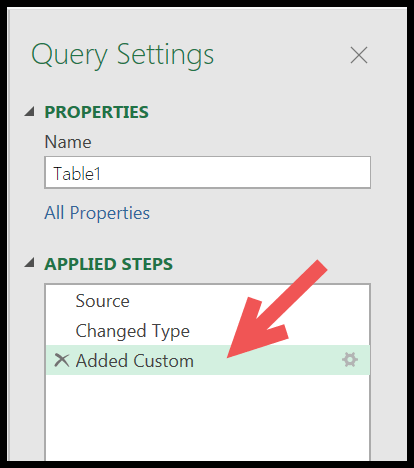
And from the dialog box, you can edit and change the formula you wrote.
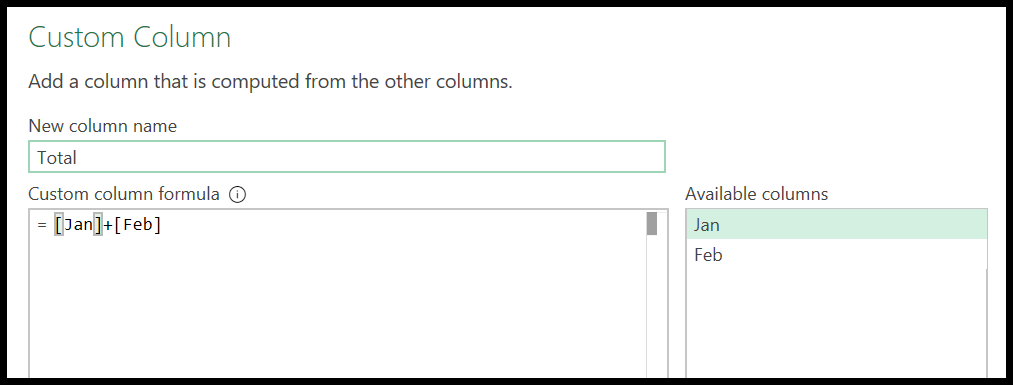
Using formulas in Power Query is like formulas in Excel; you only need to know the right function or the operator to use.
In the next part of this tutorial, we will learn to use a function to get the desired result or do a specific result with power query.
Using Functions in Power Query
Like Excel, Power Query has a long list of functions that you can use for specific calculations.
And ahead in this tutorial, we will learn to use a function to understand how to insert it using a new custom column, and here is the list of functions from Microsoft that you can refer to the search for the function you need.
In the below example, we have a list of dates, and now we need to get the last Date of the month for which these days belong. For instance, if a date is from the month (May), we need to get the last Date of May.
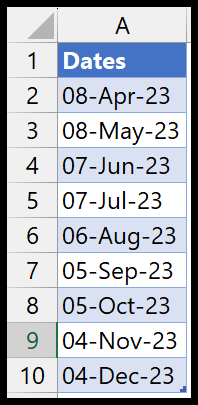
And for this, we can use the Date.EndOfMonth function. In this function, we have only one argument to define: dateTime.
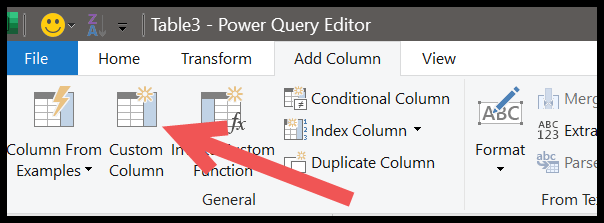
Once you load your data into the power query editor, you need to go to the Add Column tab and click on the Custom Column button to open the custom column dialog box.
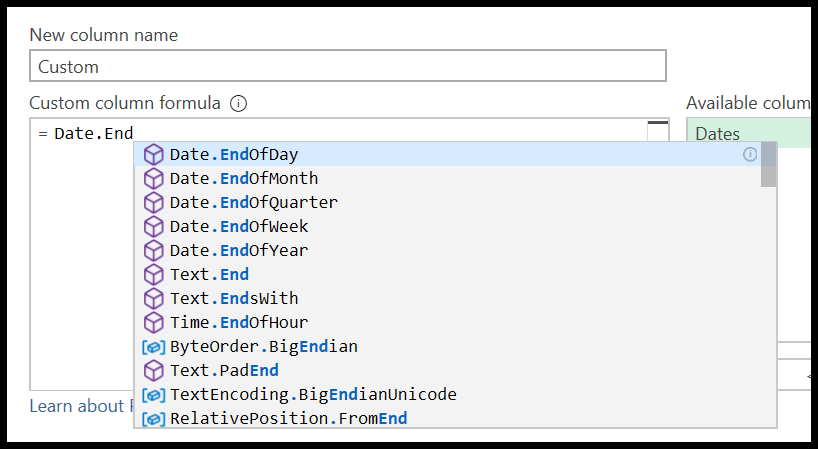
In the dialog box, enter the function’s name, Date.EndOfMonth. Instantly, Intellisense will show a list of related functions when you start typing the function’s name.
You can enter the full name of the function or click on the name you have in the list. After entering the function’s name, you need to enter a starting parenthesis and it will show you the details of the arguments you need to specify.
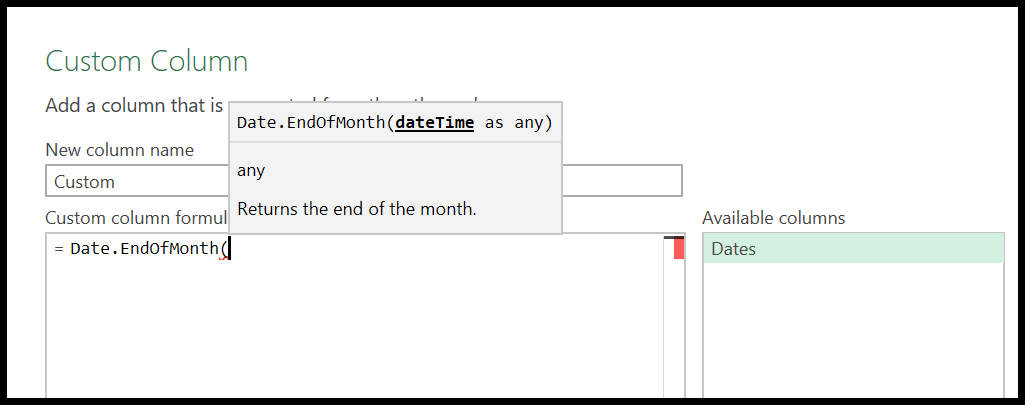
As I have mentioned earlier, we need to specify the argument dateTime, which can be a date or a date and time value. And we have a list of dates in the data loaded to the power query.
So, you need to enter the column’s name in the function’s argument. And then close the function with the closing parentheses.
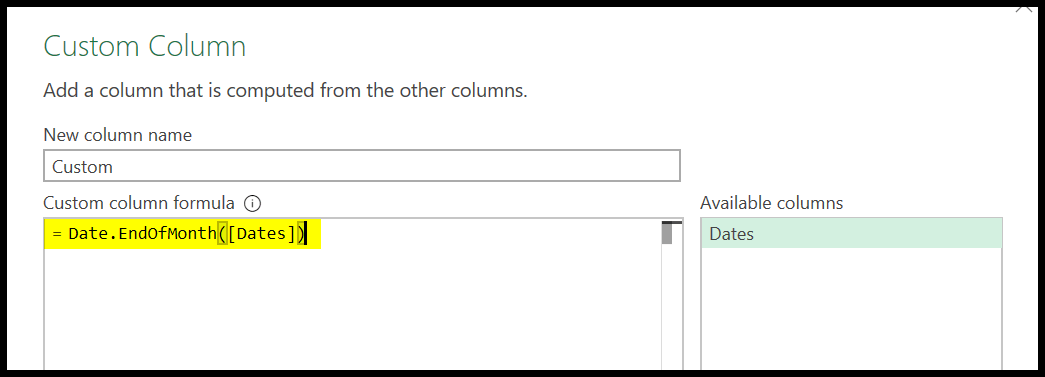
Before you click OK, add a name for the new column.

In the end, click OK to insert the column. And once you click OK, it will insert a new column with the last Date of the month according to the date that you have in the corresponding column.
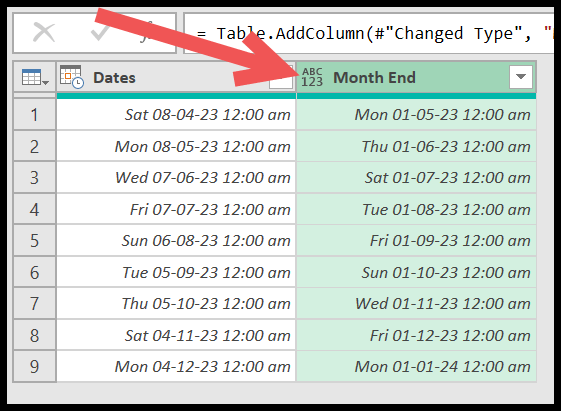
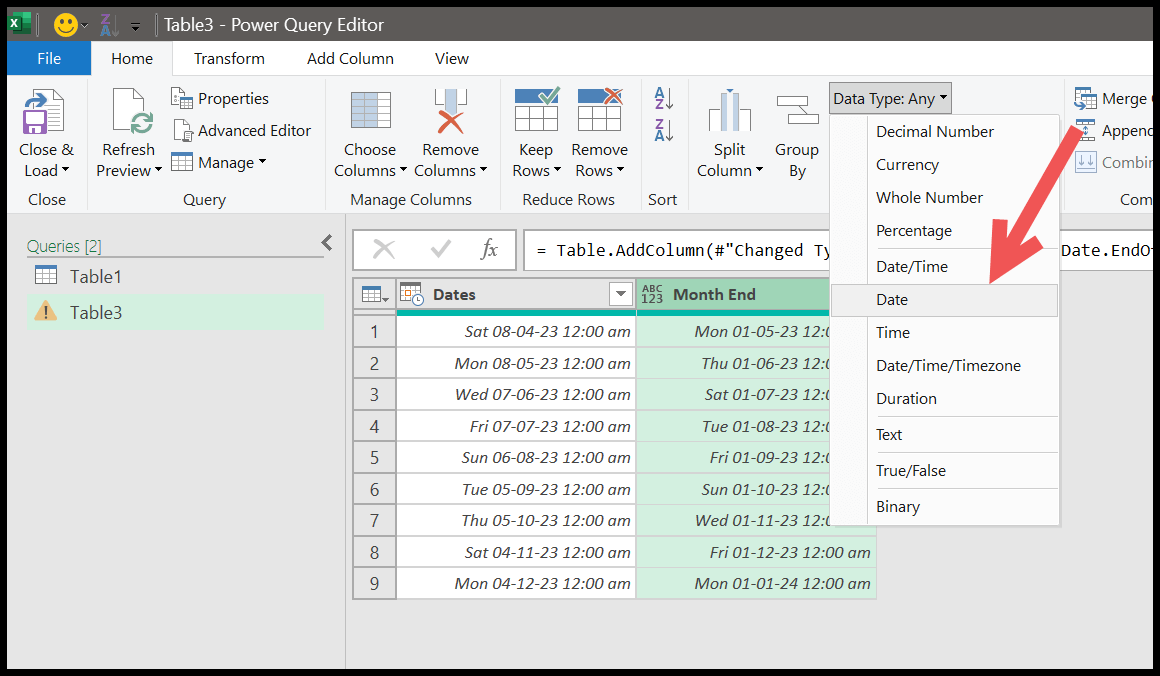
This column also has a time along with the Date, so you need to change the format of the column to only the Date. Click the “Data Type” drop down and select “Date” for this.
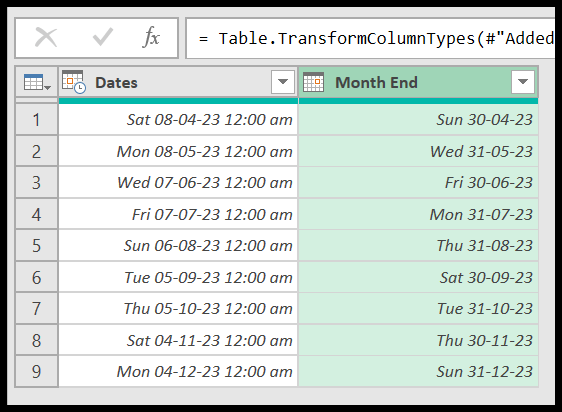
This will change the format of the column into the Date. And you can see we have the last Date of the month according to the month you have in the first column.
Using Functions for Calculations
In the above example, we have used a simple function to make you understand the steps to use any function in the power query.
Once you know which function to use for the calculation you need, you can insert a custom column and insert the function and then specify the arguments that require.