

Go to Review → Protect Workbook, keep Structure ticked, type a password and click OK, then type it again to confirm. To remove it, click Review → Protect Workbook again and enter the same password.
This protects the structure only. Nobody can add, delete, rename, move, hide or unhide sheets, but every cell can still be edited. To lock cells as well, use Review → Protect Sheet on each sheet.
To stop people opening the file at all, use File → Info → Protect Workbook → Encrypt with Password. For separate open and edit passwords, press F12 and choose Tools → General Options in the Save As dialog. Excel cannot recover a lost open password, so store it somewhere safe.
If you have forgotten the structure password on your own .xlsx file, work on a copy. Change the extension to .zip, extract it, open xl/workbook.xml in a text editor and delete the whole <workbookProtection … /> tag. Zip the extracted files (not their folder) back up and rename the result to .xlsx. This does not work on a file with a password to open, because that file is encrypted.
Password-breaker macros you find online, including the one on this page, call ActiveSheet.Unprotect, so they target sheet protection, not the workbook structure. They also depend on the weak password hash used before Excel 2013, so on files protected in a current version expect them to run for a long time and find nothing.
In Excel, you can protect and unprotect a workbook with a password. And that’s what we are going to discuss in this tutorial.
Apart from this, we will also discuss how to unprotect a workbook when you don’t remember the password, or you don’t know the password.
Let’s get started.
Protect a Workbook
- Go to the Review Tab.
- Click on the “Protect Workbook”.
- Enter the password twice.
- Hit enter to protect the workbook.
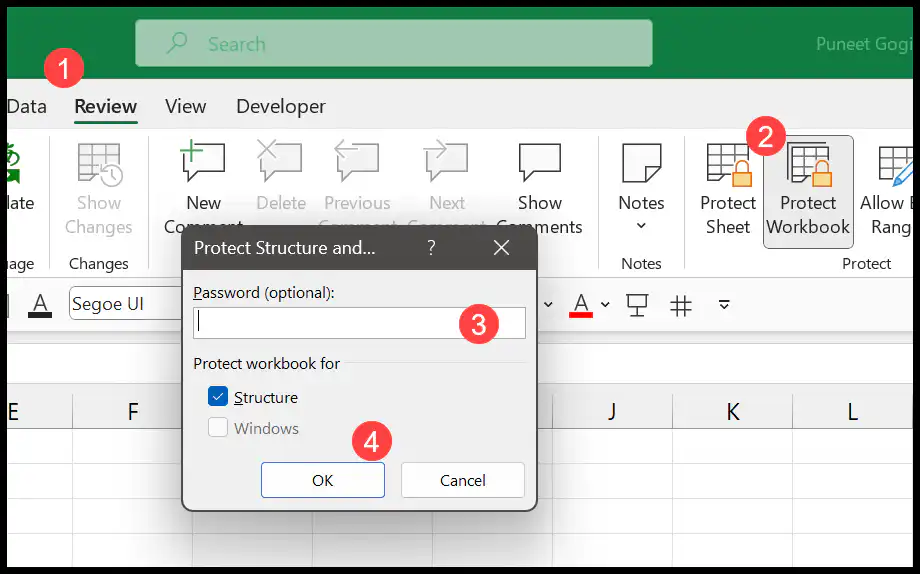
This option protects the structure of the workbook. Once it’s on, no one can add, delete, rename, move, hide, or unhide the worksheets without the password. It does not lock the cells or stop someone from opening the file; for that, you need the file-level password that I have covered later in this tutorial.
Unprotect a Workbook
- Go to the Review tab.
- Click on the Protect Workbook.
- Enter the password you specified.
- In the end, click OK to unprotect the workbook.
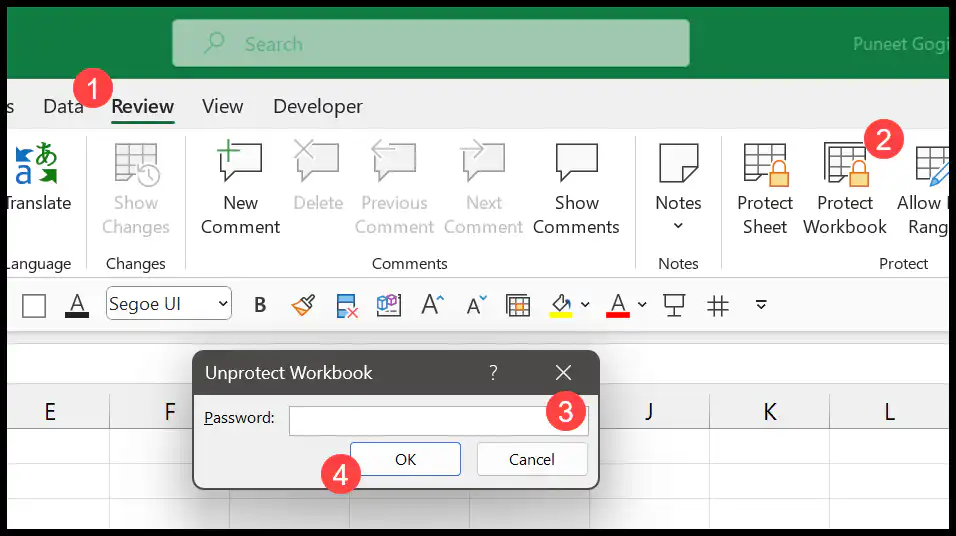
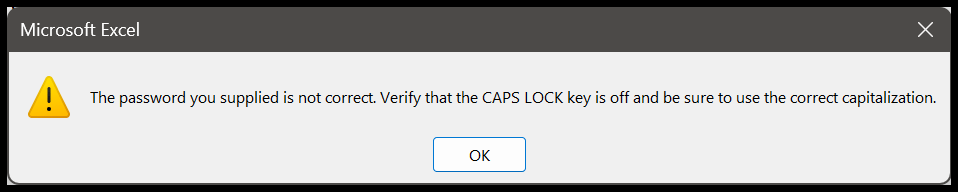
If you enter the correct password, it unlocks the workbook. And if the password you have entered is incorrect, then it will show an error like below:
What IF I Don’t Remember (Or Don’t Know) the Password
There is a VBA code (Macro) that you can use to know the password if you don’t have it.
Sub PasswordBreaker()
Dim i As Integer, j As Integer, k As Integer
Dim l As Integer, m As Integer, n As Integer
Dim i1 As Integer, i2 As Integer, i3 As Integer
Dim i4 As Integer, i5 As Integer, i6 As Integer
On Error Resume Next
For i = 65 To 66: For j = 65 To 66: For k = 65 To 66
For l = 65 To 66: For m = 65 To 66: For i1 = 65 To 66
For i2 = 65 To 66: For i3 = 65 To 66: For i4 = 65 To 66
For i5 = 65 To 66: For i6 = 65 To 66: For n = 32 To 126
ActiveSheet.Unprotect Chr(i) & Chr(j) & Chr(k) & _
Chr(l) & Chr(m) & Chr(i1) & Chr(i2) & Chr(i3) & _
Chr(i4) & Chr(i5) & Chr(i6) & Chr(n)
If ActiveSheet.ProtectContents = False Then
MsgBox "One usable password is " & Chr(i) & Chr(j) & _
Chr(k) & Chr(l) & Chr(m) & Chr(i1) & Chr(i2) & _
Chr(i3) & Chr(i4) & Chr(i5) & Chr(i6) & Chr(n)
Exit Sub
End If
Next: Next: Next: Next: Next: Next
Next: Next: Next: Next: Next: Next
End Sub
To use this code:
- Go to the Developer Tab and click “Visual Basic” to open the visual basic editor. Or you can also use the keyboard shortcut Alt + F11.
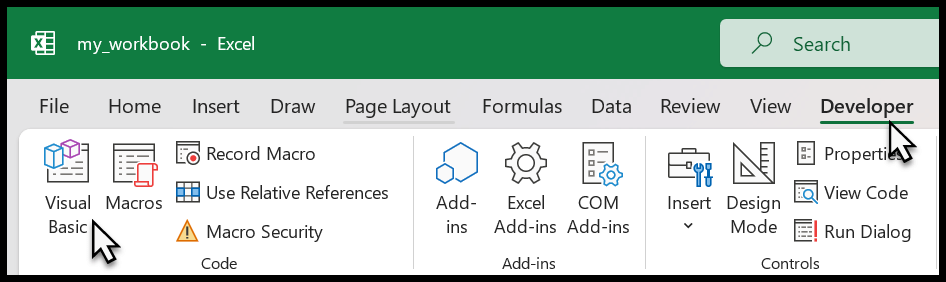
- After that, in the Visual Basic Editor, insert a new module.
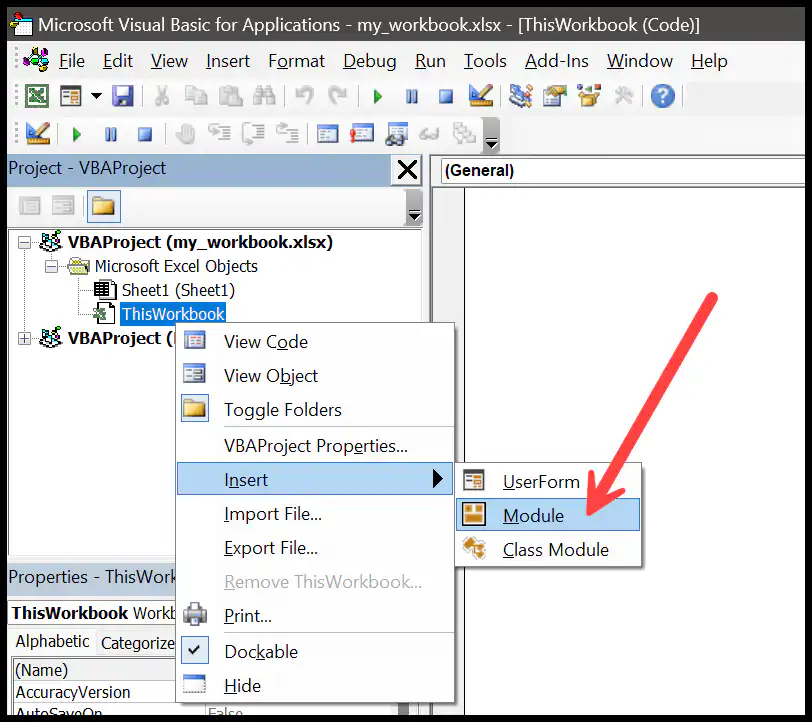
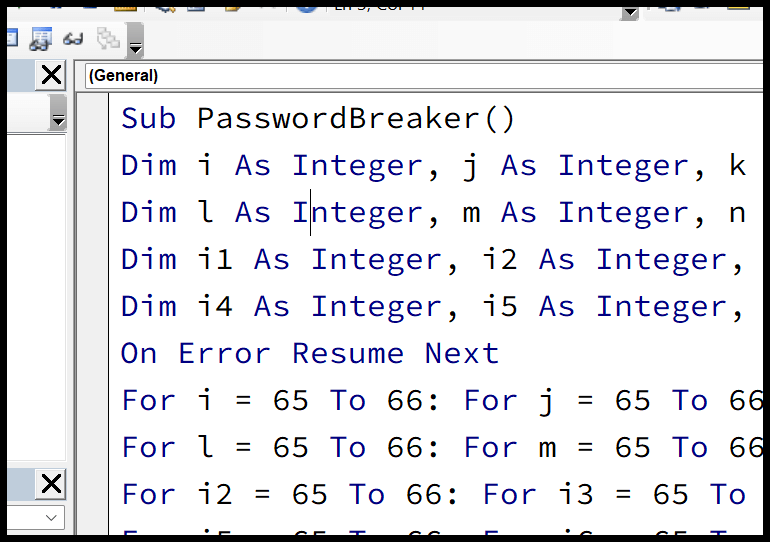
- Once you insert a new module, paste the code into the code window on the right side of the module window.
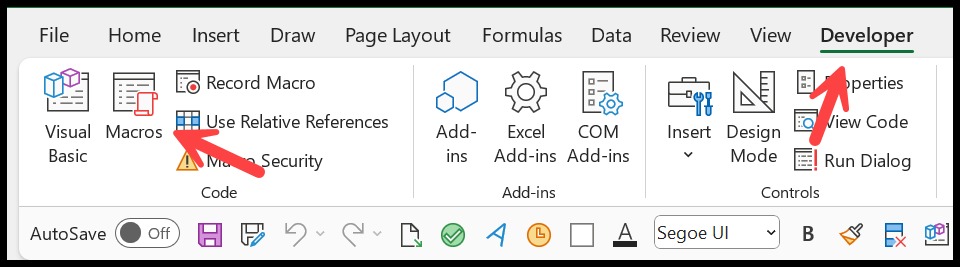
- Now close the visual basic editor, go back to the developer tab, and click on the Macros button.
- From there, select the macro and click on the Run button.
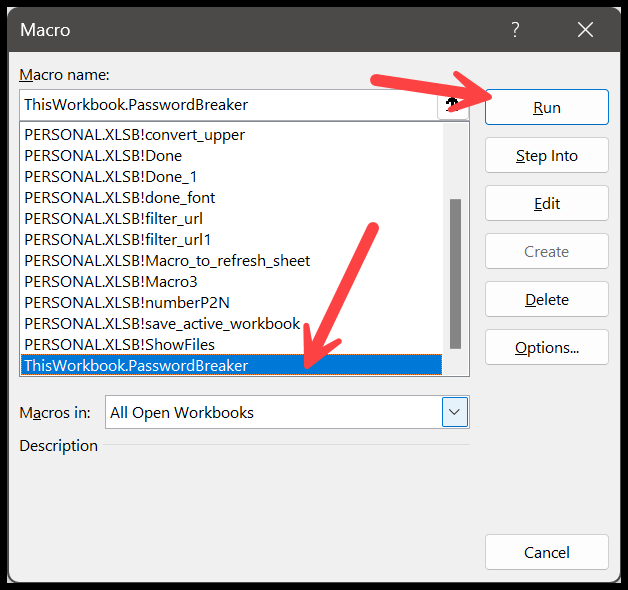
The moment you click OK, the code changes the applied password to “AAAAAAAAAAA”.
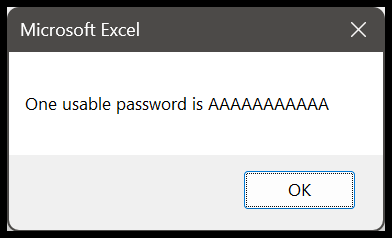
And then, you can use this password to unprotect the workbook.
Protect Workbook While Saving It
Once you go to the File tab > Save As, click the “Browse” option.
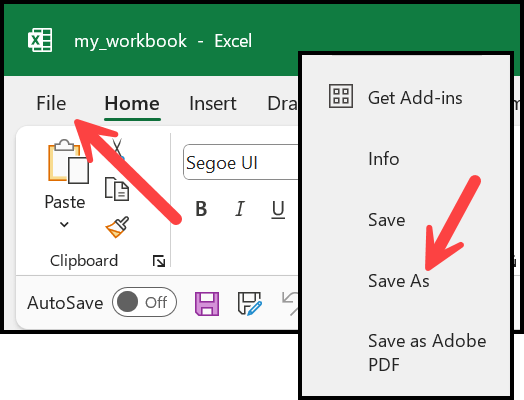
Now, locate the folder in the Save Dialog box where you want to save the file. And before you click Save, click on “Tools” and then “General Options”.
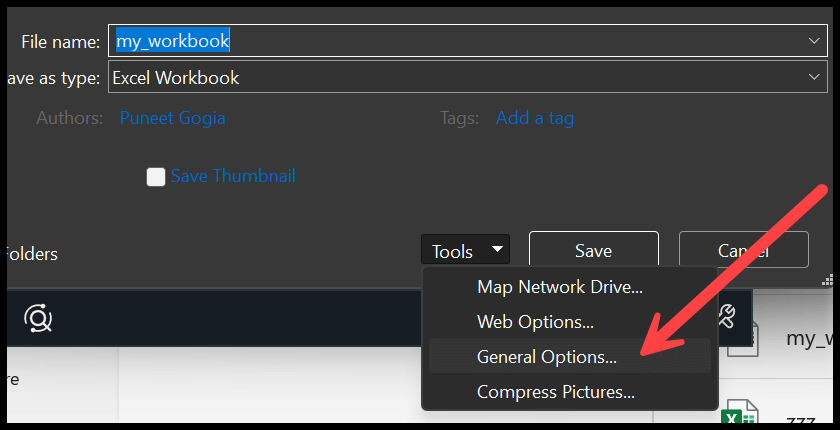
It will open a dialog box to apply the password to the file. Please enter the password to lock the file for opening and one password for modifying.
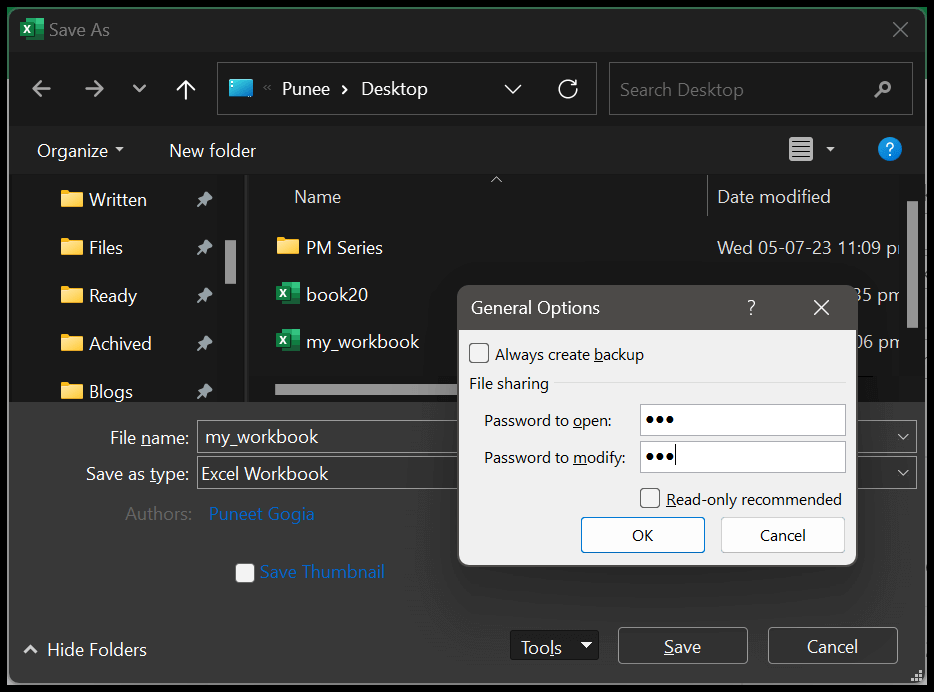
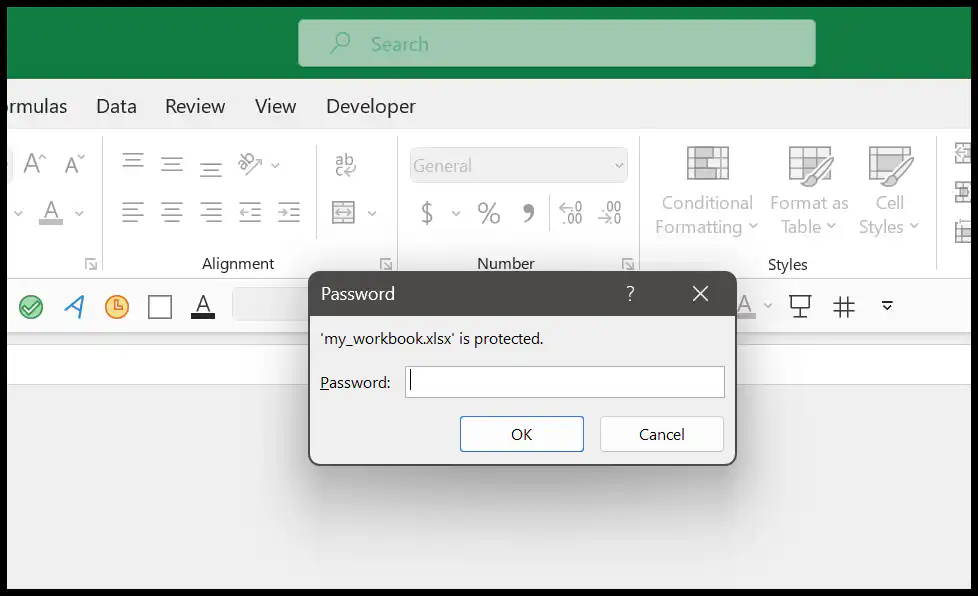
Once you enter the passwords, click OK, and then confirm each password by entering it again. Click OK to apply the password. With this, you must enter the specified password when you open the file.
Encrypt a Workbook with a Password
There is one more way to add a password that the file asks for every time someone opens it. This one sits on the File tab, and it encrypts the whole file, so it’s the option I use when I want to keep the data itself private.
- First of all, go to the File tab and click Info.
- After that, click “Protect Workbook” and then choose “Encrypt with Password”.
- Enter the password and click OK.
- In the end, re-enter the same password to confirm it and click OK again.
From now on, anyone who opens the file has to type this password first. Keep in mind that this password is case-sensitive, and Microsoft can’t recover it for you, so note it down somewhere safe. To remove it, open the same “Encrypt with Password” box, delete the password, and click OK.
Frequently Asked Questions
What is the difference between protecting a workbook and protecting a worksheet?
Protecting a workbook locks its structure, so no one can add, delete, rename, or hide the sheets. Protecting a worksheet locks the cells on a single sheet, so no one can edit them. They are two separate options on the Review tab, and you can use both on the same file.
Can I recover a forgotten workbook password?
No. Microsoft does not store these passwords and cannot recover them for you. Excel passwords are also case-sensitive, so “Excel” and “excel” are treated as two different passwords. This is why it’s a good idea to keep your passwords in a safe place.
Does protecting the workbook stop people from opening the file?
No. The “Protect Workbook” option on the Review tab only locks the structure. If you want Excel to ask for a password before the file opens, use “Encrypt with Password” on the File tab, or set a password while saving the file with the General Options method above.
Written by
Puneet Gogia
Microsoft MVP — Excel · Founder, Excel Champs
Twelve years of teaching Excel, and a decade before that using it as a data analyst. Every tutorial here is written from a file I actually built.