

Let’s say you want your Excel sheet as a PDF instead of printing on paper. Well, in Excel, there’s an option for this. When you are using Excel on Windows, there’s already a built-in printer called “Microsoft Print to PDF”.
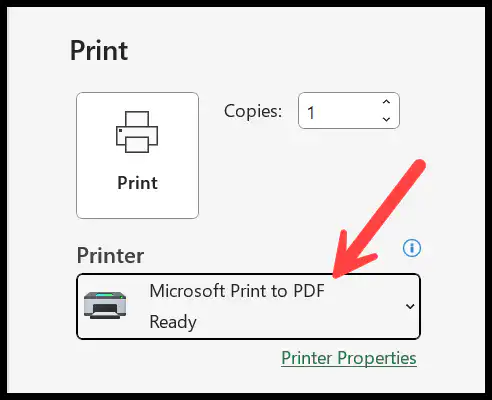
Steps to Print to PDF in Excel
- Go to the File tab and click on “Print” to go to the print section (or press Ctrl + P).
- From the Printer drop-down, select “Microsoft Print to PDF”.
- After that, click on the “Print” button to send the print request.
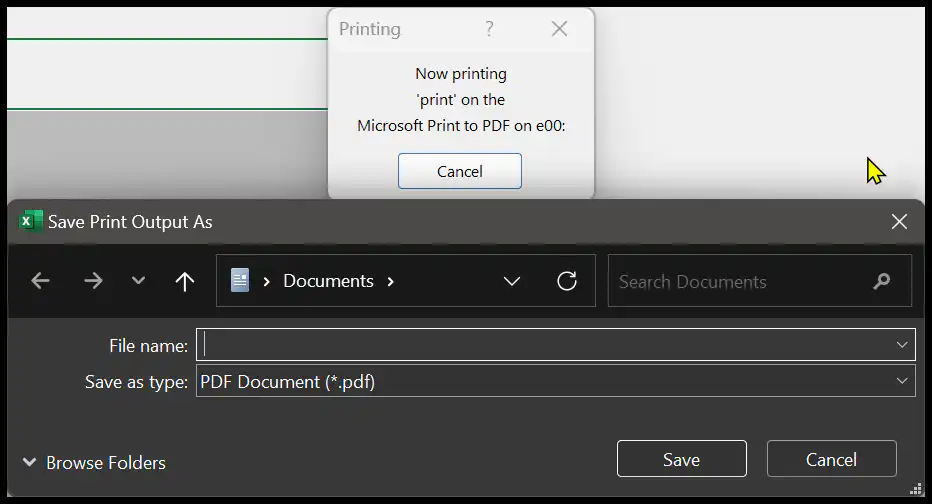
- In the end, it opens a “Save Print Output As” dialog box, where you need to select the location and the name to save the PDF file.
Before you click Print, use the first option under Settings to choose what goes into the PDF: Print Active Sheets, Print Entire Workbook or Print Selection.
Save as PDF without a PDF Printer
You don’t need a PDF printer at all, as Excel can save a PDF on its own. This also keeps the links in your sheet working in the PDF.
- First of all, go to File ➜ Export ➜ Create PDF/XPS Document and click Create PDF/XPS (or go to File ➜ Save As and pick PDF in the file type list).
- After that, click Options to choose the Selection, the Active sheet(s) or the Entire workbook, and to ignore print areas if you want.
- In the end, select the location, type a name and click Publish.
On a Mac, go to File ➜ Save As and select PDF in the File Format list, or go to File ➜ Print and click PDF at the bottom.
And if you want to do it with a macro, use the ExportAsFixedFormat method. The following code saves the active sheet as a PDF in the same folder as the workbook (the workbook needs to be saved first):
Sub save_sheet_as_pdf()
    ActiveSheet.ExportAsFixedFormat Type:=xlTypePDF, _
        Filename:=ThisWorkbook.Path & "\" & ActiveSheet.Name & ".pdf", _
        OpenAfterPublish:=True
End Sub
What If I Don’t Have “Microsoft Print to PDF” in the List of Printers
It’s there in Windows 10 and 11 by default. But if you don’t have it, there are a few methods to get it.
Method 1
Open the Run dialog box in Windows (Windows key + R), and type “optionalfeatures” in it, or copy-paste it.
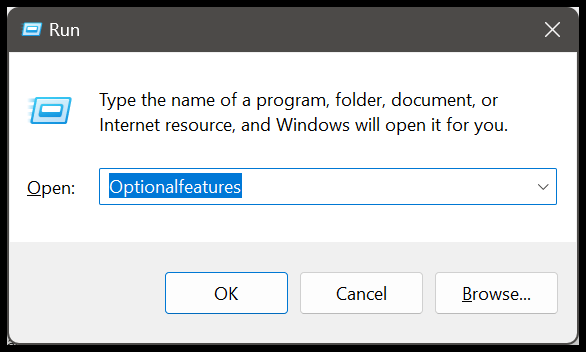
After that, click OK to open the Windows Features dialog box, where you have a list of features to select from.
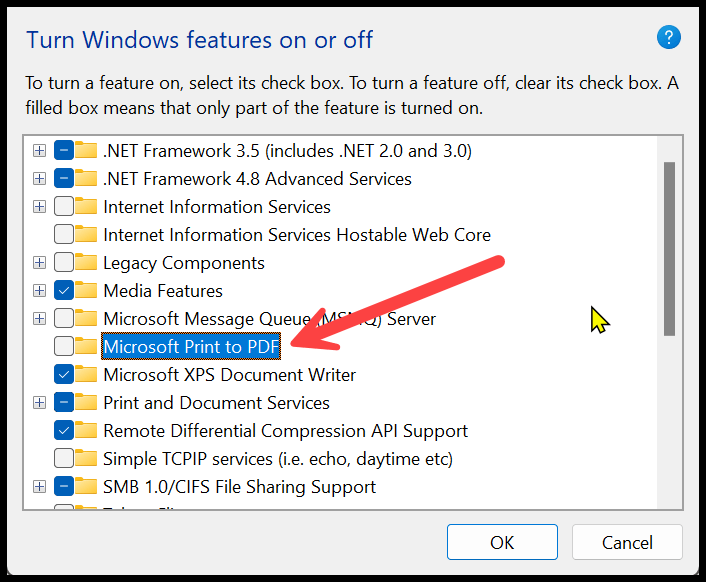
Now, look for “Microsoft Print to PDF” and tick its checkbox. Then click OK to save the setting.
Important – If it is already ticked, you need to untick it first and click OK (wait a few seconds). Then, tick it again and click OK.
Method 2
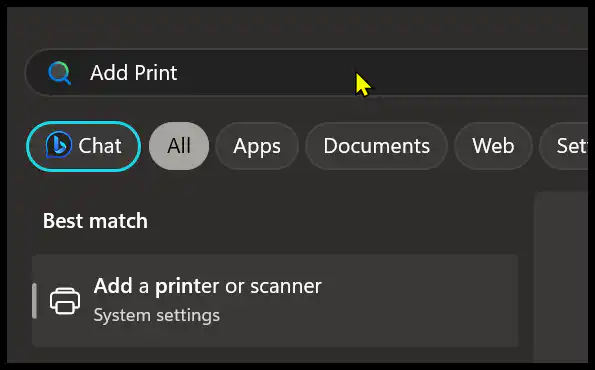
- In the second method, open the Add a printer option in Windows (Settings ➜ Printers & scanners).
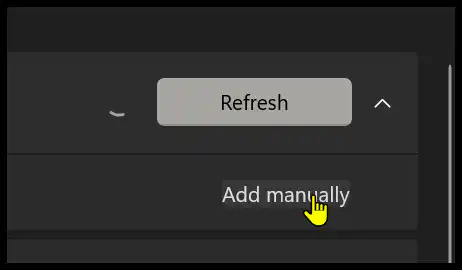
- After that, click on the “Add manually” option to add a printer manually.
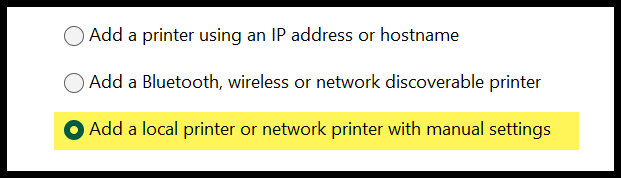
- Next, in the Add Printer dialog box, select the last option, “Add a local printer or network printer with manual settings”, and click “Next”.
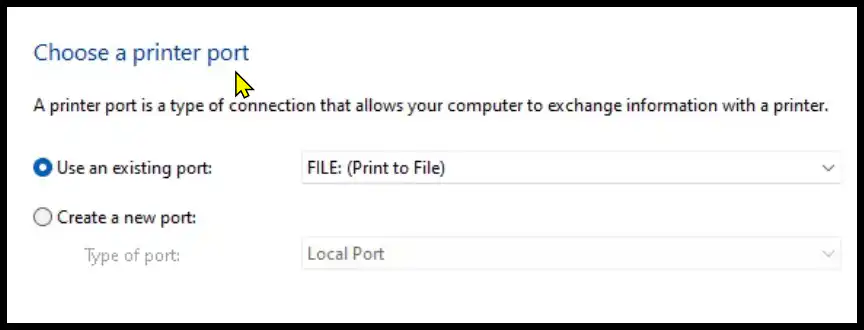
- Now, click on “Use an existing port” and select “FILE: (Print to File)” from the drop-down menu and click “Next”.
- From here, select Microsoft and then “Microsoft Print to PDF” and then click Next twice to add the printer.
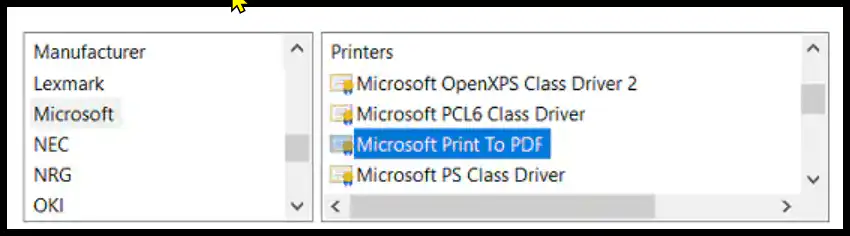
You can add “Microsoft Print to PDF” back to Windows with these steps, and then it shows in Excel’s printer list.
Frequently Asked Questions
Why is my PDF split across many pages?
The PDF follows the page setup of the sheet. Before you create it, choose Fit Sheet on One Page (or Fit All Columns on One Page) under Settings on the Print page, and pick the orientation.
How do I save the whole workbook as one PDF?
On the Print page, select Print Entire Workbook before you print to PDF, or in the Save As PDF Options, select Entire workbook.
Do hyperlinks work in the PDF?
They work when you use Save As or Export to create the PDF. When you use Microsoft Print to PDF, the PDF is like a printed page, and the links don’t work.
Written by
Puneet Gogia
Microsoft MVP — Excel · Founder, Excel Champs
Twelve years of teaching Excel, and a decade before that using it as a data analyst. Every tutorial here is written from a file I actually built.