Working in Excel has always been fun. But sometimes it feels boring to see the same formats, text, fonts, and of course the same boring numbers.
Undoubtedly, you can change the appearance a little bit by using the Font option. But there is a lot more that you can do with the text direction and alignments.
This will not only change the look but more importantly saves a lot of space. Scrolling down to the next pages sometimes is annoying. So you can fit the report on one page by playing around with the text orientation & Alignment in simple steps.
- First, select the cell where you want to rotate the text. Here, we have selected the header row.

- Now, Go to the Home tab and look for the Alignment tab in the ribbon.

- Then, Click on the Orientation button.

- Here you will get some default options in the drop-down.

- Now let’s try this one by one and see what happens to the text.

- In fact, you can get a sense from the symbol in front of each option about what is going to happen to your text.

This was about the default options you can use quickly over one click. Now for those who do not like this setup, there is something else, you can choose.
- To get to the next level, again select the cells you wish to rotate and click on the last option “Format Cell Alignment”.

- After this, you will get a dialogue box opened in front of you.

- Towards the right, under Orientation, you can simply drag the red dot upwards and downwards to add a custom angle to your text.

- Moreover, you can manually enter a certain angle +positive or -negative next to “Degrees”.

Text Alignment
Here comes the interesting part. Until now we have been talking about the text direction or you can say Orientation. The next thing you should know is Text Alignment. In other words, you can choose the location of the text i.e towards the center, right, left, top, or bottom of the cell. Let’s see how.
- First, select the cell→Home→Alignment→Orientation→Format Cell Alignment.

- Now you have 2 options Horizontal & Vertical and click on the little drop-down arrow.

- Here you need to try every option and analyze what suits your report. Here’s a snapshot of what it looks like:-

This might seem confusing, but surely will be better when you try it once.
Tip: Do not use a fixed set of arrangements for every report because the orientation and alignment depend on the length and type of text you have.
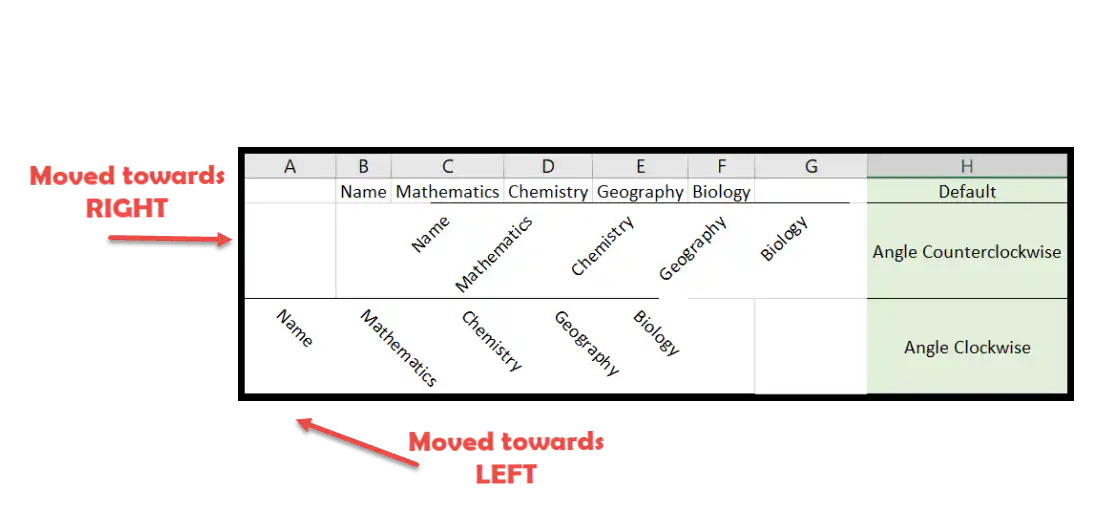
For example, The default text started from Column B1:F1. But you will notice that as soon as we used the Orientation “Angle Counterclockwise”, the text moved towards the Right cell and the Left using “Angle Clockwise”.
This could be problematic if our data started from Column A since it would have gone out of the report view. So, you have to try every option and choose wisely according to your report and data type.