Whenever I finish preparing a report in Excel, I always mark the Workbook as final.
This simple step ensures that no one can accidentally make changes. It’s like putting a “hands-off” label on my work, signaling that the document is complete and ready for review without further edits. It’s like a read-only mode.
Marking a workbook as final is like sealing an envelope before sending it. Once it’s sealed, no one can easily change the data inside.
It signals that the work is complete as a final version and shouldn’t be altered, just like a sealed envelope signal that the message inside is ready to be delivered without any changes.
It’s one of the least used options in Excel, but it’s worth learning and using if you share many reports with your team or clients; it is worth learning to mark the current Workbook as the final.
With a workbook which is marked as a final workbook, it shows a message below the ribbon that says “MARKED AS FINAL An author has marked this workbook as final to discourage editing.”

Let’s understand how it works…
Steps to Mark a Workbook as a Final in Excel
When you want to make any of your Workbooks as a final version, you don’t need to do something extra.
Here are the steps to follow.
- First, open the Excel workbook that you want to mark as final. Make sure all your data and formatting are complete.
- After that, go to the File tab and then click at the top right side of the Excel Window. Tr you can also use the keyboard shortcut Alt + F. This takes you to the backstage view of Excel.

- Now in the File tab, you need to go to the ‘Info” section which is on the #6 in the list of sections within the file tab. You need to click on it to open it.

- And once you do that, you get further options there to use. You will find the “Protect Workbook” drop-down with the “Mark as Final” option you need to use.

- Therefore, when you click on the “Protect Workbook”, you have the “Mark as Final” at the end of the list. All you need to do is to click on it.

- From here, you will get a confirmation dialog box saying, “This workbook will be marked as final and then saved”. All you need to do is to click “OK” to mark the Excel file as final. If your Workbook is not saved, it will ask you to save it and the mark is as final.

And the next moment, it will show you a dialog box that says:
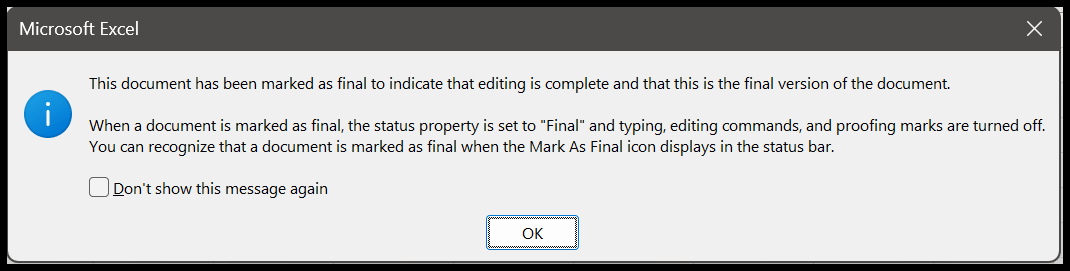
“This document has been marked as final to indicate that editing is complete and that this is the document’s final version.
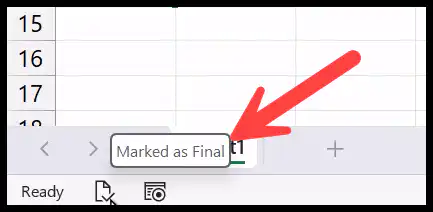
When a document is marked as final, the status property is set to “Final” and typing, editing commands, and proofing marks are turned off. You can recognize that a document is marked as final when the Mark As Final icon displays in the status bar.”
And after that, you get this alert of the below the ribbon that says

Note – If using Excel 2007, go to the Office Button > Prepare > Mark as Final. All later versions, such as Excel 2010, 2013, 2016, 2019, and 365 steps, are almost the same.
VBA Code to Mark a Workbook as Final
Yes, you can use VBA code to mark your Excel file as the final Workbook. All you need to do is add this code to your Workbook in a new module and run it to mark the Workbook as final.
Sub MarkWorkbookAsFinal()
    Dim wb As Workbook
    Set wb = ThisWorkbook
    ' Mark the Workbook as final
    wb.Final = True
    ' Save the Workbook to apply the changes
    wb.Save
    MsgBox "The workbook has been marked as final.", vbInformation
End Sub
The code begins by declaring a variable for a reference to the Workbook you’re working on with Set wb = ThisWorkbook.
Then, the line wb.Final = True tells Excel to mark the Workbook as complete, meaning editing commands, typing, and proofing marks are turned off.
After marking the Workbook as final, the code automatically saves the Workbook with wb.Save to ensure the final status is applied.
Finally, a message box pops up with a friendly reminder that the Workbook has been marked as final.
What Happened When You Mark a Workbook as Final
When you mark a workbook as final in Excel, a few things have been fixed to mark it as final to indicate that the Workbook is complete and discourage the user from further editing.
When you open a workbook that is already marked as final, you can’t use the options from the ribbon. Excel disables entering data, editing, and formatting options.
This means you won’t be able to add or modify data, change formulas, or adjust the formatting of the Workbook.
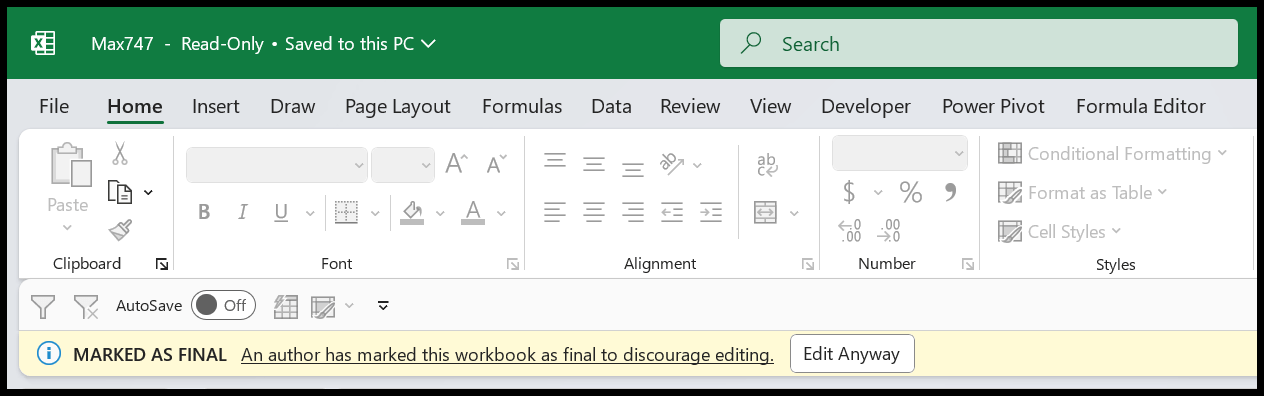
As I have mentioned twice, when someone opens the Workbook, they will see a notification at the bottom of the ribbon indicating that the Workbook has been marked as final.
The Workbook’s status is set to “Final,” a flag within Excel to manage the Workbook’s behavior as described above.
But What IF I Edit a Workbook which is Marked as Final
Even though there are restrictions, the “Mark as Final” status is not a security feature.
If you or anyone else opens the Workbook, click “Edit Anyway” in the notification bar, removing the final status and re-enable all editing features.
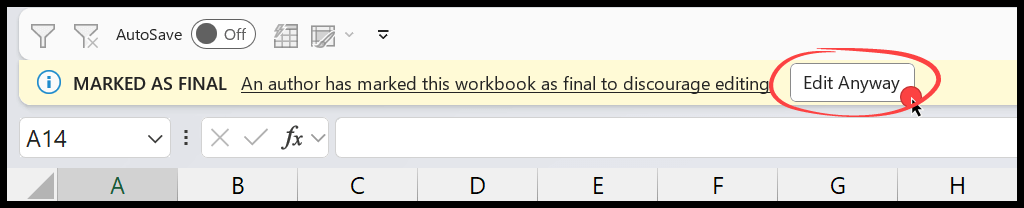
The moment you click the “Edit Anyway” button in the notification bar, the “Mark as Final” status is removed. This means the workbook returns to its normal state, allowing you to make necessary changes.
Best Practices to Use Mark as Final
Before using the option, thoroughly review the Workbook to ensure all data is correct and no further changes are needed. For more sensitive workbooks, use additional protection methods, such as password protection or protect worksheets, alongside marking the Workbook as final.